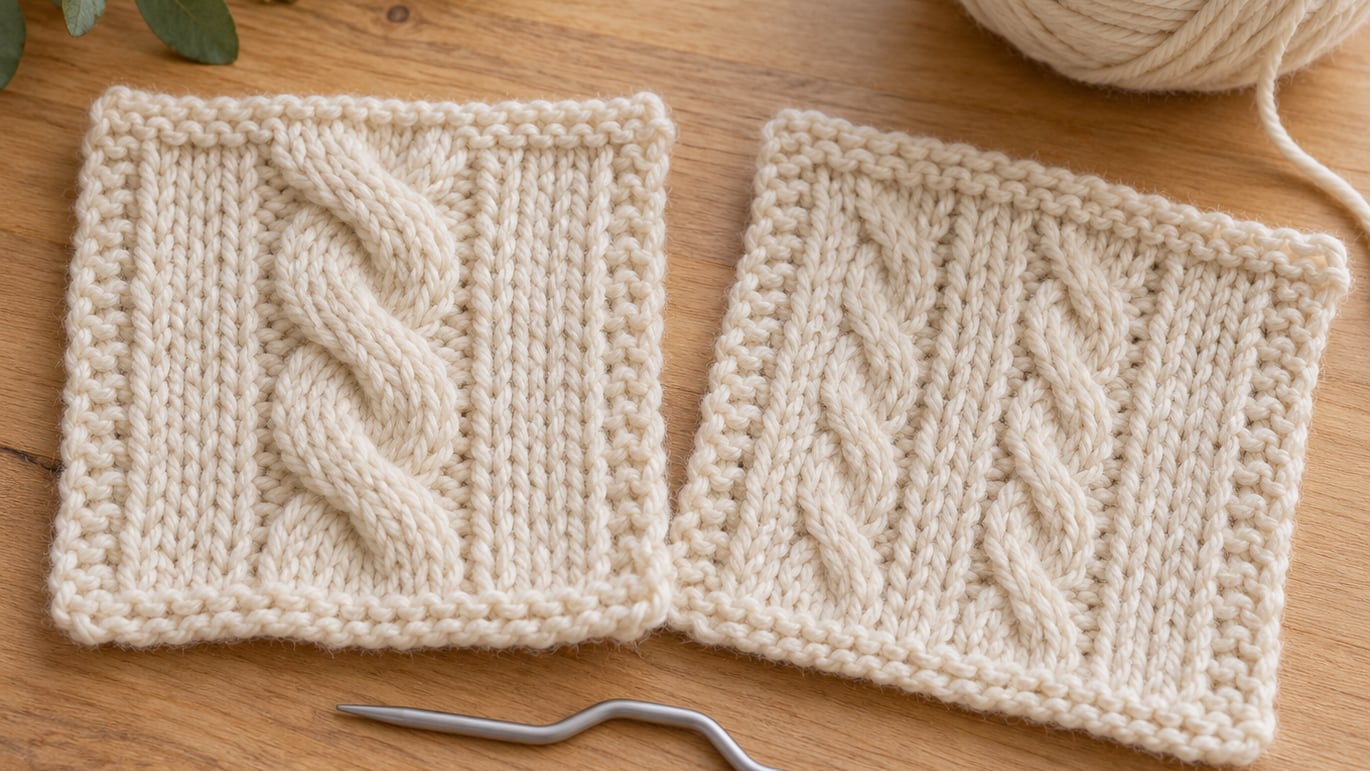
If you’ve ever pulled a cabled sweater off a shelf and wondered how knitters get those neat twisted ropes to sit so perfectly on top of the fabric, here’s the secret: cable knitting for beginners is a lot less scary than it looks. You only need to know two stitches and one extra tool, and you can finish your first mini cable in an evening. This guide walks you through what cables are, the small kit you need, and the exact hand moves for your first twist.
Table of Contents
- What Cable Knitting Actually Is (and Why It Looks Fancy)
- What You Need to Start Cable Knitting
- The Two Stitches You Must Know First
- How a Cable Needle Works
- Reading Cable Pattern Abbreviations
- Step-by-Step: Your First Cable (C4F)
- How to Fix a Cable That Looks Wrong
- Easy Cable Knitting Patterns for Beginners
- How to Read a Cable Chart
- Blocking and Finishing Your First Cable Project
- Common Mistakes Beginner Cable Knitters Make
- Frequently Asked Questions
- What is the hardest part of cable knitting for beginners?
- Can I cable knit without a cable needle?
- What yarn is best for cable knitting for beginners?
- How long does it take to knit a simple cable scarf?
- Why does my cable look twisted or lean the wrong way?
- What is the easiest first cable knitting project to try?
What Cable Knitting Actually Is (and Why It Looks Fancy)
Cable knitting is the process of working stitches out of order so a group of stitches crosses over another group, creating a raised twist that looks like a rope or braid sitting on the surface of the fabric. The clever part is that you’re not adding any new stitches and you are not using any fancy yarn. You’re just rearranging the order in which you knit them.
The “fancy” look comes from the way a few knit stitches float on top of a background of purl stitches. When you cross them, the knits stay raised and the purls sink in, so the twist pops out. That is why cables are so satisfying on a sweater, hat, scarf, or blanket.
You should be comfortable with the basic knit stitch and purl stitch before you start cabling. If you can knit a small square of stockinette (a fabric of knit on the right side, purl on the wrong side), you are ready. Plan on about 10 to 20 hours spread across a couple of weeks for a first project, and assume a few of those hours will go to frogging (ripping back) when a cable leans the wrong way. That is normal.
What You Need to Start Cable Knitting
Your shopping list is small, and you can find everything at a local yarn shop or online.
- Worsted weight yarn in a light, smooth fiber. Avoid fuzzy or heavily textured yarn for your first cable, because halo and fuzz hide the twist.
- Straight or circular knitting needles in US size 7 or 8 (4.5 to 5 mm). The label on your yarn will suggest a needle size; start there.
- A cable needle. The U-shaped or straight short needle holds the stitches while you cross. Buy a small pack of cable needles so you can try a couple of sizes.
- A tapestry needle (a blunt yarn needle with a big eye) for weaving in ends.
- Small scissors and a row counter or a sticky note to track your rows.
Worsted weight yarn and US size 7-8 needles are the easiest combo for new knitters because the stitches are big enough to see and count, but the fabric still holds the shape of the cable. If you are between sizes, go up one needle size. Loose tension is your friend on a first cable.
The Two Stitches You Must Know First
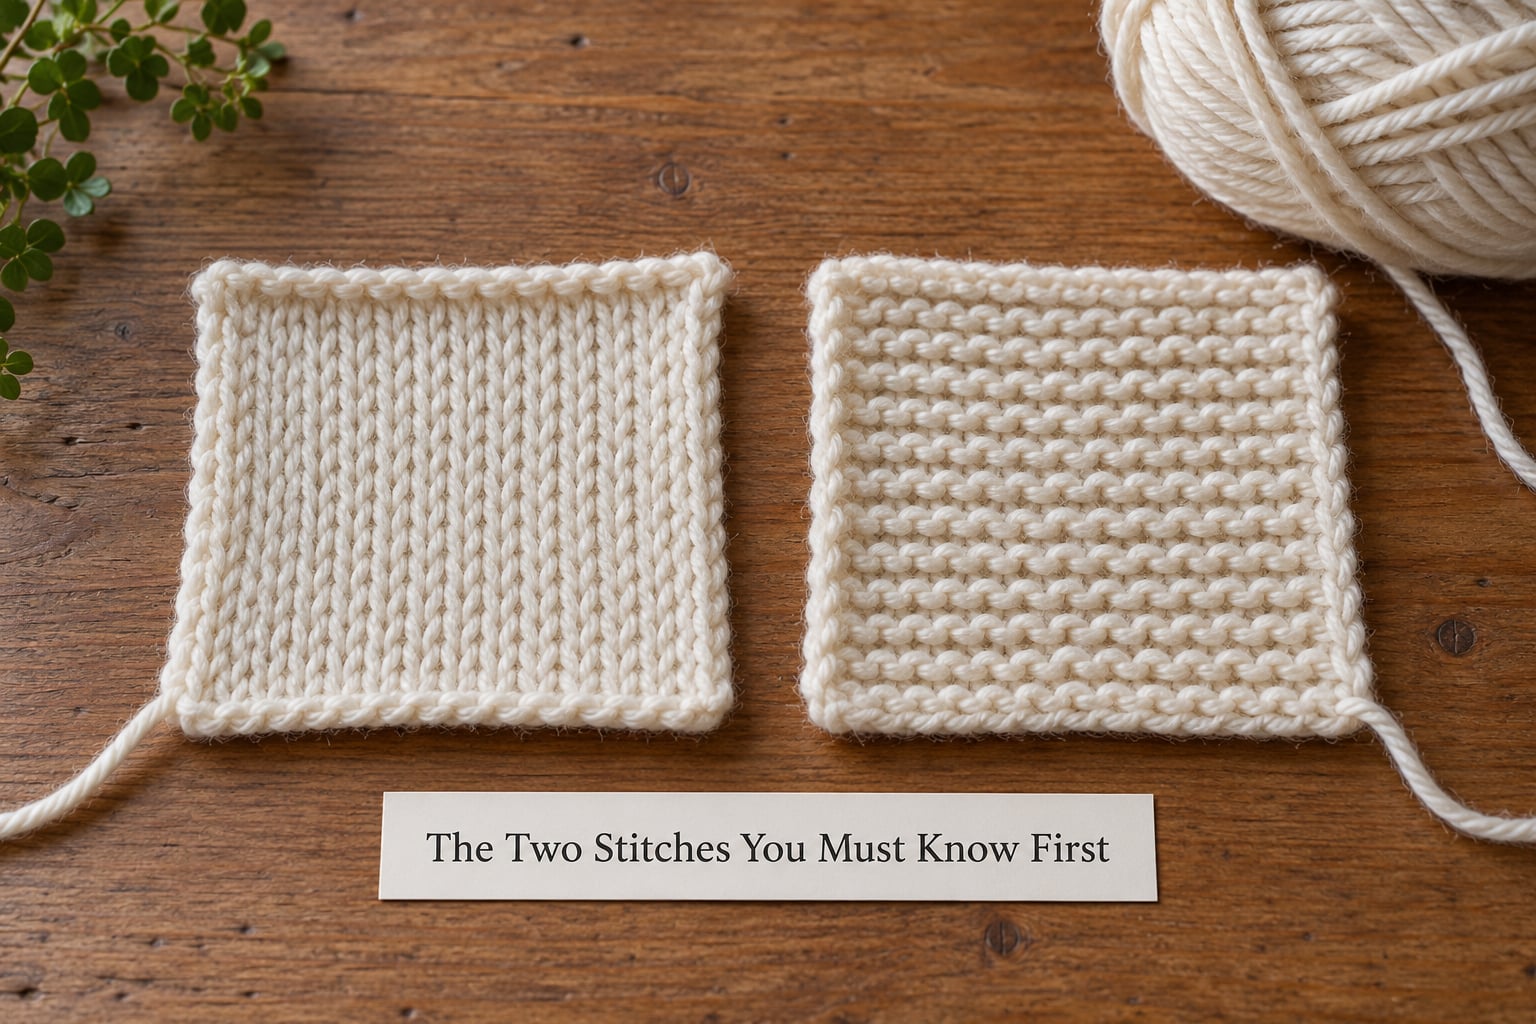
Cables use only two stitches: knit and purl. The knit stitch makes a smooth V on the right side of the fabric. The purl stitch makes a small bump. When you alternate them, you get ridges and texture.
Reading your knitting is the third skill that matters most. Look at the right side of your swatch. A row of V shapes means that row is knit. A row of bumps means that row is purl. If you can name which row you just finished, you will be able to follow any cable pattern.
Most beginners make a small stockinette swatch first, then a reverse stockinette swatch, and pin them to a corkboard. They are the visual reference for “knit background” and “purl background,” and they help a lot when a pattern tells you to “work the next row in purl.”
How a Cable Needle Works
A cable needle is a short needle with a bend or a U in the middle so slipped stitches don’t slide off. Most sets come in three sizes: mini, standard, and large. The size you pick should be smaller than your main needles, so the held stitches don’t stretch the fabric and leave a gap.
Slip the number of stitches your pattern says onto the cable needle, then either hold that needle in front of the work or behind the work. Holding in front pulls those stitches to the right of the cross; holding in back pulls them to the left. That is the entire difference between a left-leaning cable and a right-leaning cable.
If you do not have a cable needle on hand, a double-pointed needle (DPN) in the same size as your main needles, or even a clean safety pin, can hold the slipped stitches in a pinch. Many knitters learn the no-cable-needle method eventually, but starting with a real cable needle is easier on your hands.
Reading Cable Pattern Abbreviations
Cable patterns use short codes that look like a secret language at first. Once you crack two of them, the rest follow the same pattern.
- C2F: cable 2 front. Slip 2 stitches to a cable needle, hold in front, knit 2 from the left needle, knit 2 from the cable needle. Result: a small right-twisting cable.
- C2B: cable 2 back. Slip 2 to a cable needle, hold in back, knit 2 from the left needle, knit 2 from the cable needle. Result: a small left-twisting cable.
- C3F and C3B: same idea, but with 3 stitches each side. The cross looks chunkier.
- C4F and C4B: 4 stitches each side, used in classic Aran-style cables. This is the one we’ll work below.
- LC: left cross. Same as C2B in most charts.
- RC: right cross. Same as C2F in most charts.
The number tells you how many stitches to hold, and the letter tells you where to hold them. Front usually means “twist to the right” and back means “twist to the left,” but always check the pattern’s key. A pattern will also tell you how many rows to work between cable crosses (often 2, 4, 6, or 8). Mark that number on a sticky note and stick it to your pattern.
Step-by-Step: Your First Cable (C4F)
Work a swatch in stockinette (or a 4-stitch reverse stockinette panel flanked by garter) and put a C4F on row 4. The whole cross takes about 90 seconds once your hands know the moves.
- Knit rows 1, 2, and 3 of the swatch as the pattern tells you (often knit the knit stitches and purl the purl stitches of the panel).
- On row 4, when you reach the cable, slip the next 2 stitches onto your cable needle purlwise. Hold that needle in front of your work.
- With the main needle, knit the next 2 stitches from the left needle. That’s the “back” of the cable being worked first.
- Bring the cable needle back to your main needle and knit those 2 held stitches off the cable needle.
- Continue across the row in whatever stitch the pattern says (usually purl on a reverse stockinette background).
That is your first cable. On the next row, the pattern will usually ask you to purl the knit stitches and knit the purl stitches so the background stays smooth. The cross will sit on top of the fabric like a tiny rope. To see it lean the other way, repeat but hold the cable needle in back instead. That is a C4B.
How to Fix a Cable That Looks Wrong
Three problems show up in almost every first cable. Each has a quick fix.
Cable is twisted. You held the cable needle on the wrong side of the work. If the twist leans away from you when you read the pattern as right-twisting, hold in back next time, and vice versa. The fix in your existing project is to tink back (unknit stitch by stitch) to the cross and redo it.
Hole where the needle sat. Your held stitches stretched the fabric. Pull the working yarn snug after the first knit stitch off the cable needle, or use a smaller cable needle next time. A tail of yarn the same weight woven across the gap will also close a small hole invisibly.
Cable leans the wrong way. That is the most common beginner surprise, and it is not a real mistake. C4F and C4B are mirror images of each other, and one is supposed to lean left and the other right. If a pattern calls for alternating C4F and C4B, the twists will spiral. If you meant to do C4F and got a C4B, just tink back and redo. Otherwise, leave the lean; it is part of the design.
Easy Cable Knitting Patterns for Beginners
Pick one small project to finish before you start a big one. The first one is for practice, not for the gift pile.
- Chunky cabled headband. Cast on around 16 stitches in a bulky yarn, work a 6-row repeat with a single C4F on rows 1 and 5, and seam the ends. You can finish one in an evening.
- 6-stitch rope cable infinity scarf. Cast on 30 stitches in a smooth worsted, work a 6-stitch rope cable (C6F every 8 rows) on a stockinette background, and join the ends with a 3-needle bind-off for a clean finish.
- Coffee cup cozy. Cast on 24 stitches, work in the round, and place a single C4F every 6th round. A great way to practice the same move in the round, where the “front” of the work faces you the whole time.
Each of these uses one type of cable, repeats it often enough that your hands learn the rhythm, and finishes in a weekend. Once you have one of these in your project bag, larger Aran sweaters stop feeling like a foreign language.
How to Read a Cable Chart
Cable charts are grids where each square is one stitch, and each row of squares is one row of knitting. Right-side rows read right to left, and wrong-side rows read left to right, the same way you knit them.
The cable symbol almost always shows a little hook or arc that crosses one set of stitches over another. If the arc goes up and to the right, you are holding the cable needle in front (a right-twisting cable). If the arc goes up and to the left, you are holding in back. The number in the box tells you which row you are on.
The single best habit cable knitters develop is sticking a sticky note on rows they have already finished. Slide it up the chart as you work. It stops you from cabling the same row twice and from missing a row in between. A second sticky note for “where am I in the repeat” makes a 24-row pattern chart feel tiny.
Blocking and Finishing Your First Cable Project
Blocking is the step that turns a slightly lumpy first cable into a sweater-shop-finish cable. Two methods work for beginners.
Wet blocking: soak the finished piece in cool water with a drop of wool wash for 15 minutes, gently press (do not wring) the water out in a towel, then lay it flat on a blocking mat and pin it to the measurements in your pattern. The stitches relax, the twist sharpens, and the fabric evens out.
Steam blocking: lay the piece flat, hold a steamer or a steam iron about an inch above the surface (never touching the yarn), and let the steam do the work. Good for acrylics and other fibers you cannot soak. For wools and alpacas, wet blocking is gentler and gives a softer hand.
To finish, weave in all ends with your tapestry needle. Run the tail along the purl side of the background for about an inch, change direction, and run it back. Trim close. Do this before blocking so the ends settle into the fabric at the same time as the stitches.
Common Mistakes Beginner Cable Knitters Make
Most first-cable mistakes are tiny and avoidable. Here are the four I see most often, and the practical fix for each.
Forgetting which row you are on. Cable patterns only work if you cable on the right row. Use a row counter, a sticky note, or the row number on your knitting app. If you are unsure, count the bumps of garter stitch on the edge of the swatch; they are a free row counter.
Picking a fuzzy yarn that hides the cable. Mohair, alpaca boucle, and any brushed yarn are tempting in a yarn shop, and they will swallow your cable. Save them for a project where the texture is the point. For learning cables, choose a smooth worsted in a light color. Light colors show off the twist; dark colors hide the details.
Knitting too tightly around the cable needle. Tight tension is the number one reason first cables look “wonky,” as a lot of beginners describe it on r/knitting. Loosen up by one needle size on cable rows, or pause after the first stitch off the cable needle and gently pull the working yarn to close the gap without cinching the twist.
Skipping the gauge swatch. Cable patterns rely on the cable being the right size for the background. If your gauge is off, the cable will pull the fabric and look stretched. A 4-inch by 4-inch swatch before you start a sweater saves hours of regret. Reviewers consistently say a small swatch caught most of their tension problems before they hit row 50.
Frequently Asked Questions
What is the hardest part of cable knitting for beginners?
Most beginners say tension is the hardest part. It is easy to knit the stitches around the cable needle too tightly, which makes the twist look pinched and leaves small holes next to it. The fix is to pause after the first stitch off the cable needle, loosen your hands, and let the working yarn sit at a normal tension before the next stitch. A cable needle one size smaller than your main needles also helps a lot.
Can I cable knit without a cable needle?
Yes, and a lot of knitters eventually prefer it. You slip the stitches off the left needle and either let them hang in front of the work or pinch them against the right needle while you knit the next set. It feels awkward for the first few rows, but it is faster once your hands know it. Start with a real cable needle to learn the geometry, then try the no-needle method on a coffee cozy or a headband.
What yarn is best for cable knitting for beginners?
A smooth, light-colored worsted weight yarn is the easiest place to start. Smooth fibers (wool, wool blends, acrylic) show off the twist, light colors make the cables easy to see, and a medium weight gives you stitches big enough to count. Avoid mohair, boucle, and very dark yarns until you have made a few cables. Your yarn label will suggest a US needle size, usually 7 to 9, which is a good starting range.
How long does it take to knit a simple cable scarf?
For a true beginner, a simple 6-stitch rope cable scarf in worsted weight usually takes 12 to 20 hours of actual knitting. Spread that across a few weekends and the stitches stay even. Add time for the first project if you are also learning to read a chart and to block. A chunky headband with a single cable repeat is faster, usually one evening for a first-timer.
Why does my cable look twisted or lean the wrong way?
Cables lean left or right depending on whether you held the cable needle in front (C2F, C4F) or in back (C2B, C4B). If yours leans the opposite way the picture shows, you held on the wrong side. Tink back to the cross row, redo it with the cable needle on the other side, and the twist will match. Many patterns use alternating C4F and C4B on purpose, so a left-leaning cable next to a right-leaning one is usually the design, not a mistake.
What is the easiest first cable knitting project to try?
A chunky cabled headband, a 6-stitch rope cable infinity scarf, or a coffee cup cozy are the three easiest first cable projects. Each uses one type of cable, repeats it often enough for your hands to learn the rhythm, and finishes in a weekend. A headband is the smallest commitment and a great place to try the move for the first time. A scarf or infinity scarf is the next step up and gives you room to practice reading a chart and counting rows.