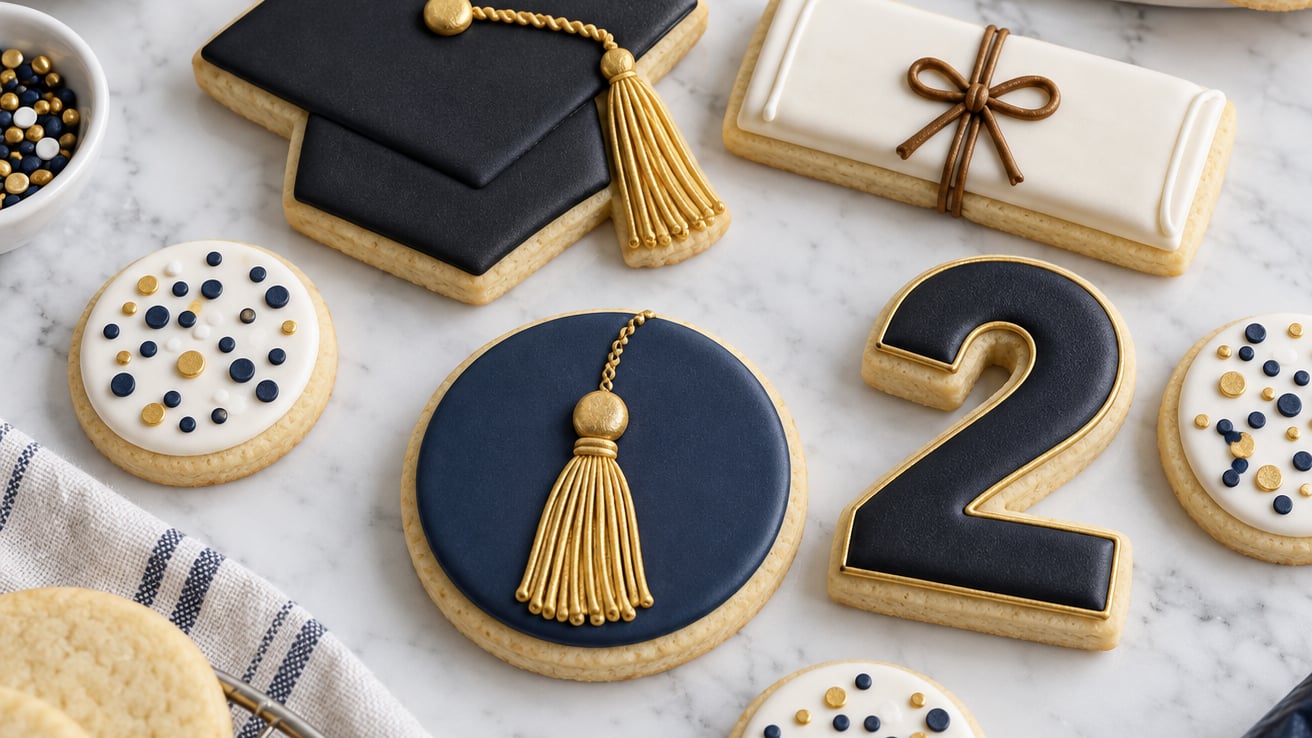
Graduation cookie decorating ideas range from a single tassel dot on a round sugar cookie to a full platter of mortarboard squares, diploma rolls, and confetti bursts. I bake for three graduates this time of year, and the designs that travel best and photograph the prettiest are almost always the ones that match the school’s two colors. Pick one anchor design, two or three supporting shapes, and a color story, and the whole party tray comes together in a weekend.
Table of Contents
- Graduation Cookie Decorating Ideas at a Glance
- 1. Classic Graduation Cap Cookies
- 2. Rolled Diploma Cookies
- 3. Class Year Number Cookies
- 4. Graduation Cap Brownie Bites
- 5. Tassel-Topped Round Cookies
- 6. School Color Stripe Cookies
- 7. Diploma Scroll Cookies
- 8. Graduation Cap with Custom Name
- 9. Confetti and Star Burst Cookies
- 10. Stacked Books and Diploma Cookies
- 11. Mini Mortarboard Cookie Pops
- 12. Thank You, Teacher Graduation Cookies
- Frequently Asked Questions
- How far ahead can I decorate graduation sugar cookies?
- What icing is best for graduation cookie decorating ideas: royal icing or glaze?
- How long do decorated graduation cookies need to dry before stacking?
- Can I freeze graduation cookies after decorating them?
- What is the easiest graduation cookie design for a beginner?
- How do I match my school’s exact colors for graduation cookies?
- Picking the Right Graduation Cookie Design for Your Party
Graduation Cookie Decorating Ideas at a Glance
| # | Design | Difficulty | Main Technique | Best For |
|---|---|---|---|---|
| 1 | Classic Graduation Cap | Intermediate | Outline and flood with piped tassel | Anchor cookie on the tray |
| 2 | Rolled Diploma | Intermediate | Piped ribbon and seal | Pairing with cap cookies |
| 3 | Class Year Number | Intermediate | Flood icing in school colors | Year-specific grads |
| 4 | Grad Cap Brownie Bites | Advanced | Ganache and piped tassel | Quick shortcut to chocolate lovers |
| 5 | Tassel-Topped Round | Beginner | Single piped tassel and dot | New decorators |
| 6 | School Color Stripes | Intermediate | Flood stripes with scribe drag | Big batches for big parties |
| 7 | Diploma Scroll | Intermediate | Piped spiral ends and ribbon | Showstopper side cookie |
| 8 | Cap with Custom Name | Advanced | Piped fine lettering on cap | Personalized gifts |
| 9 | Confetti Star Burst | Beginner | Dots, stars, and short lines | Kids helping decorate |
| 10 | Stacked Books and Diploma | Advanced | Cut shapes with piped spines | Showpiece cookie |
| 11 | Mini Mortarboard Pops | Intermediate | Dipped coating and piped cap | Grab-and-go party tables |
| 12 | Thank You, Teacher | Beginner | Lettering or simple motifs | Grad gifts for teachers |
1. Classic Graduation Cap Cookies
The mortarboard is the icon of any graduation cookie platter. Bake a 3-inch square or round sugar cookie, outline the cap in black or a deep school color, flood the same color, then add a small fondant or piped cap base centered on top. Once the base dries, pipe a tassel from the center button down the side with a small round tip, finishing with a tiny fringe.
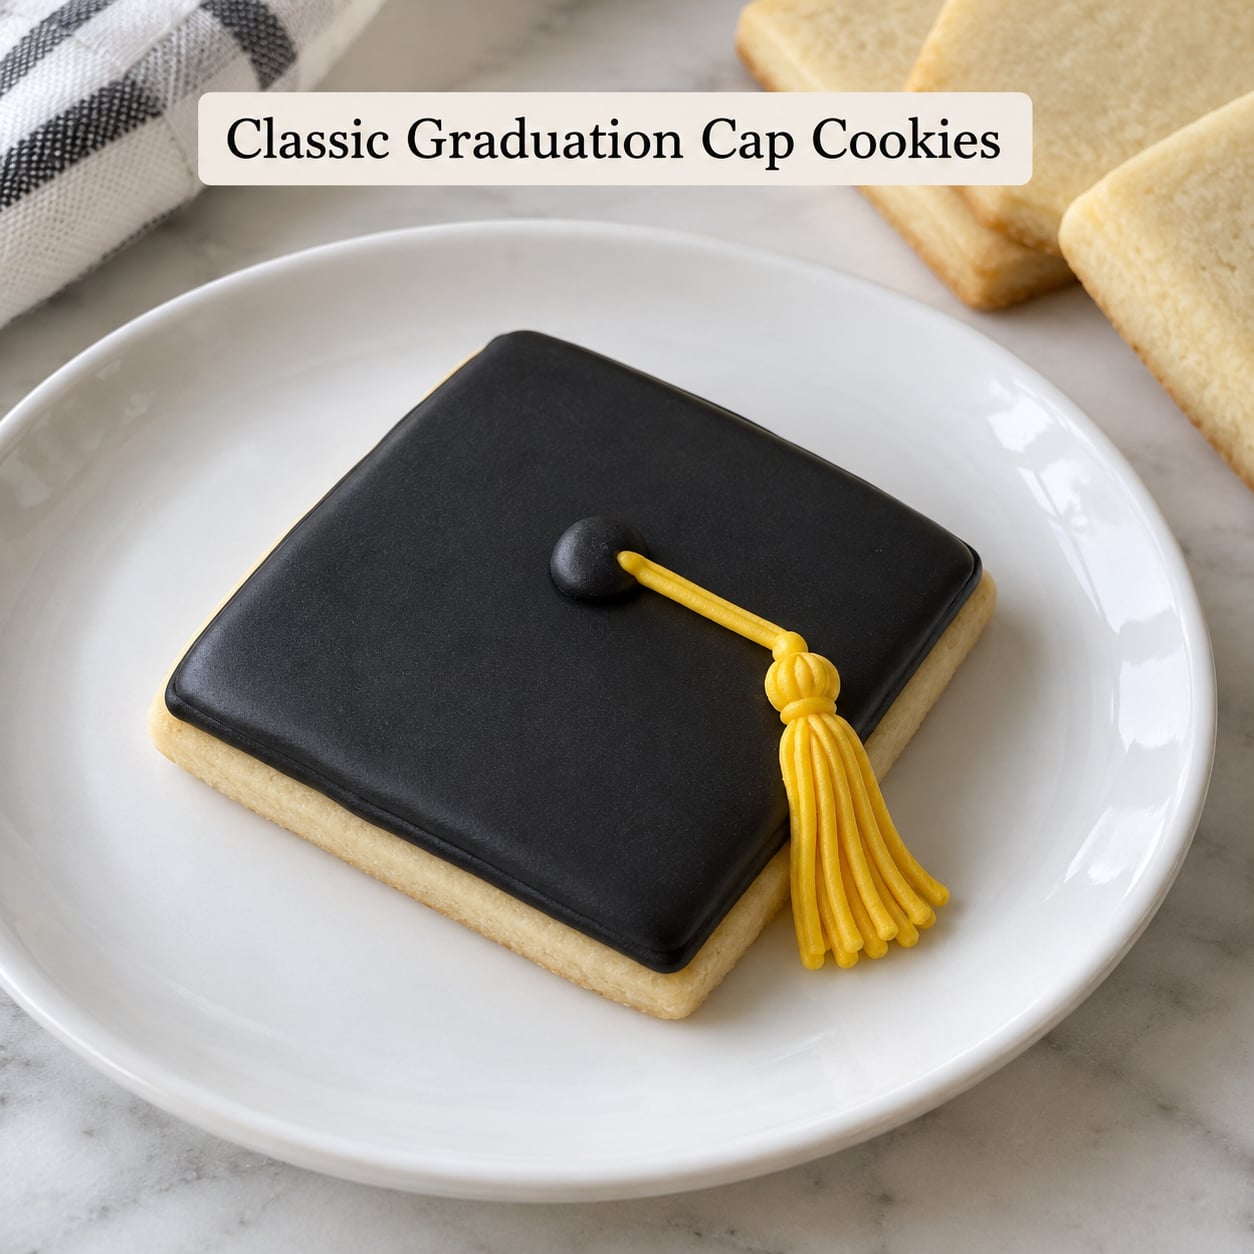
Let the flood coat dry at least 20 minutes before you add the tassel, or the weight of the icing line will dent the surface. I keep a damp paper towel over the bowl between bakes so the icing does not crust.
2. Rolled Diploma Cookies
Cut rectangles about 3 by 1 inch, then flood in cream or ivory. Once dry, pipe a thin brown ribbon horizontally across the cookie using a small round tip, then add a tiny red or gold dot at one end to fake a wax seal. For a real rolled look, pipe two parallel lines and drag a toothpick from one end to the other before the icing sets.
Reviewers on the cookiedecorating sub often point out that the diploma with ribbon detail is what tips the cookie tray from cute to clever. The trick is keeping the ribbon line thin so the cookie still reads as a diploma and not a wrapped present.
3. Class Year Number Cookies
Number cutters give you a high-impact cookie with very little piping. Flood the number in the school’s primary color, let it dry, then pipe a thin outline in the second school color and add a few confetti dots. For custom school hues, mix food gel rather than liquid color so the icing does not split.
Two numbers per cookie (for example, the graduate’s entering and graduating year) reads well on a smaller cutter. Use a 3-inch cutter and aim for about a quarter inch of flood icing over the edge to keep the lines clean.
4. Graduation Cap Brownie Bites
When you are short on time, a 2-inch brownie square topped with a chocolate ganache cap is faster than baking and icing sugar cookies. Cut cooled brownies into 2-inch squares, spread a smooth ganache on top, then add a small piped black tassel. The ganache sets firm enough to stack and travels without cracking.
This is also the best option if your graduate prefers chocolate to sugar cookies. You get the same cap-and-tassel silhouette on the party table.
5. Tassel-Topped Round Cookies
The easiest graduation cookie decorating idea in this list. Flood a 3-inch round in any single color, and once dry, pipe a single small tassel from the top center. Add a tiny dot below it to suggest the cap button. One color, one tip, ten minutes per dozen.
Beginners in r/Baking often start here because there is no outline to keep clean and no risk of color bleed between sections. It is also a forgiving design if you only have one or two icing colors on hand.
6. School Color Stripe Cookies
For a big batch with a strong color story, flood rectangles or ovals in two or three vertical school colors. Pipe each color in its own section, then drag a toothpick or scribe tool vertically through the wet icing to clean up the color line before it sets.
Stick to two colors for the cleanest cookie look, three if your school has a third accent. Letting each stripe dry for ten minutes before you pipe the next color next to it prevents the edges from bleeding into each other.
7. Diploma Scroll Cookies
Cut longer rectangles, about 4 by 1 inch, and flood in ivory. Once dry, pipe a small spiral at each end using a small round tip to suggest a rolled scroll, then add a thin icing ribbon across the middle as if it is tied with string.
The spiral ends are easier than they look. Two to three small circles at each end of the rectangle, piped from the outside in, give the scroll effect without needing fondant.
8. Graduation Cap with Custom Name
Start from the classic cap design, then use a #1 round tip to pipe the graduate’s name in cursive across the cap base. Plan the spacing by lightly marking the cookie with a food-safe marker before you pipe, and let the lettering dry fully before any stacking.
Reviewers on r/cookiedecorating note that piping on a black cap base needs high contrast, so white or school-color icing on black works best. Yellow or gold on navy is a classic college combination.
9. Confetti and Star Burst Cookies
Flood rounds in white or a pale school color, then let the kids loose with a small round tip and stars of icing. Small dots, tiny lines, and star tips scatter like confetti across the surface. A 30-second design per cookie is realistic.
Use this design if you have helpers. The shapes are simple enough that younger decorators can hold a piping bag without ruining the cookie, and the random pattern means there is no wrong way to place the dots.
10. Stacked Books and Diploma Cookies
Cut two or three rectangles of slightly different widths to suggest a stack of books, with a smaller rectangle on top as the diploma. Flood the books in different school colors, pipe thin lines for spines, and add a small piped ribbon on the diploma on top. It is the showiest cookie on the list, but the cut-and-stack takes patience.
Trim the corners of each rectangle slightly so the stack reads as books. Adding one piped line per spine gives just enough texture without crowding the cookie.
11. Mini Mortarboard Cookie Pops
Use a small 1.5-inch round cutter on a stick, dip each one in melted chocolate or candy coating in black or a school color, then pipe a tiny cap on top with a tassel once the dip sets. They are perfect for grab-and-go party tables and easy to hand out at the door.
Stick the cookie on the stick before the chocolate sets so it is firmly attached. The dipped coating hides any small cracks in the cookie surface, so this is a forgiving option for less-than-perfect rounds.
12. Thank You, Teacher Graduation Cookies
For grads giving cookies to favorite teachers, a simple round or rectangle flooded in white or school color with a piped “Thanks” or a small apple-and-pencil motif works well. Use a small round tip for lettering, or stencil the word and fill it in.
Wrap each one in a small cellophane bag with a ribbon and a note from the graduate. This is the design in this list that travels best, because the simple flooded surface has nothing to crack during transport.
Frequently Asked Questions
How far ahead can I decorate graduation sugar cookies?
You can decorate graduation sugar cookies up to 2 weeks ahead if you store them properly. Baked, unfrosted sugar cookies keep in an airtight container at room temperature for about 2 weeks. Once decorated and fully dried, royal icing cookies hold for 2 to 3 weeks in a sealed container at room temperature. Plan to do your decorating 5 to 7 days before the event so you are not rushing last minute.
What icing is best for graduation cookie decorating ideas: royal icing or glaze?
Royal icing is the better choice for graduation cookie decorating ideas because it dries hard, holds fine detail like tassel lines and lettering, and stacks without sticking. Glaze icing sets softer, so it looks glossy but smudges during transport. If you want a softer bite, a flood-consistency royal icing thinned with a teaspoon of water still gives clean lines and a softer bite.
How long do decorated graduation cookies need to dry before stacking?
Decorated graduation cookies need at least 6 to 8 hours of dry time at room temperature before stacking, and 12 to 24 hours is safer for designs with multiple layers like cap-and-tassel or piped lettering. The icing should feel completely hard to a light touch, not tacky at all. Low humidity speeds drying, while a small dehumidifier in a humid kitchen helps a lot.
Can I freeze graduation cookies after decorating them?
You can freeze graduation cookies after decorating them once the royal icing is fully dry, usually 24 hours after the last layer. Place them in a single layer in an airtight container with parchment between layers, and freeze for up to 3 months. Thaw in the container at room temperature to prevent condensation from forming on the icing surface, which can cause colors to bleed.
What is the easiest graduation cookie design for a beginner?
The easiest graduation cookie design for a beginner is the tassel-topped round cookie. You flood a 3-inch round in a single color, then pipe one small tassel and a tiny cap dot in the center once the base dries. It uses one or two icing colors, one round piping tip, and no outline work, so there is very little that can go wrong on the first try.
How do I match my school’s exact colors for graduation cookies?
To match your school’s exact colors for graduation cookies, mix food gel rather than liquid food color so the icing does not split. Start with a small amount of gel on a toothpick and build up color slowly, because icing dries a shade or two darker than it looks in the wet bowl. If your school has a Pantone or hex code, test a small batch first and let it dry fully before committing to a full tray.
Picking the Right Graduation Cookie Design for Your Party
If this is your first graduation cookie tray, start with one of the beginner designs: the tassel-topped round, the confetti star burst, or the teacher thank-you. Each uses one or two icing colors and a single round tip, so you can finish a dozen cookies in an afternoon without royal icing experience.
If you have piped cookies before and want more variety on the tray, the intermediate set (cap, diploma, class year, stripes, scroll) gives you a complete party look in a single weekend. For a showpiece, the cap with a custom name, the stacked books, the brownie bites, or the mini mortarboard pops make one or two statement cookies among the simpler designs.
Pick your school’s two colors first, then choose the anchor cookie (most bakers start with the classic cap) and two or three supporting shapes that share the same color story. A simple first batch tells you how your icing behaves in your humidity, and the second batch is the one your guests will actually see on the table.