
If you have ever stared at a tray of plain sugar cookies and wondered how home bakers get those smooth, picture-perfect finishes, the answer is simpler than you think. These 12 sugar cookie decorating ideas for beginners each need only basic supplies, run 15 to 45 minutes per batch, and produce bakery-looking cookies on the first try. Pick the style that matches your occasion, and you can decorate a full dozen tonight with nothing fancier than a bowl, a spoon, and a sandwich bag.
We pulled these techniques together for first-time decorators and parents introducing kids to cookie art. Most require no piping skills, no specialty equipment, and no trip to a craft store. A few are forgiving enough to hand to a four-year-old. The rest are gateway methods that grow with you as your confidence builds. By the end of the list, you will know which technique to reach for Christmas morning, a birthday party, a bridal shower, or a quiet Saturday with a cup of coffee.
Table of Contents
- Sugar Cookie Decorating Ideas for Beginners at a Glance
- 1. Classic Royal Icing Flood Cookies
- 2. Dip-and-Spread Glaze Icing
- 3. Buttercream Swirls and Rosettes
- 4. Sprinkle-Only Decorating (No Skill Required)
- 5. Edible Marker Doodles
- 6. Stamped Cookies with a Cookie Stamp
- 7. Painted Cookies with Gel Food Coloring
- 8. Fondant Cut-Outs and Layered Shapes
- 9. Marbled Icing with a Toothpick
- 10. Holiday and Seasonal Sprinkle Mixes
- 11. Pressed Sugar Flowers and Sugar Pearls
- 12. Stenciled Cookies with Luster Dust
- Frequently Asked Questions
- Do sugar cookies need to be completely cool before decorating?
- Can you freeze sugar cookies after they are decorated with royal icing?
- What is the easiest icing for beginners to use on sugar cookies?
- How long do decorated sugar cookies stay fresh at room temperature?
- How far ahead of a party can I decorate sugar cookies?
- What is the best food coloring to use for cookie decorating?
- Start Decorating Tonight
Sugar Cookie Decorating Ideas for Beginners at a Glance
| Technique | Difficulty | Drying Time | Supplies Needed | Best For |
|---|---|---|---|---|
| 1. Royal icing flood | Easy-medium | 6-8 hours | Piping bag, meringue powder | Weddings, baby showers, holidays |
| 2. Glaze icing dip | Very easy | 1-2 hours | Powdered sugar, milk, bowl | Last-minute treats |
| 3. Buttercream rosettes | Easy | None | Star tip, piping bag | Birthday parties, cupcakes-style |
| 4. Sprinkle-only | Very easy | 30 minutes | Corn syrup, sprinkles | Kids’ parties, classroom treats |
| 5. Edible marker doodles | Easy | 2-3 hours base | Food-safe markers | Personalized gifts, names |
| 6. Stamped cookies | Easy | None | Cookie stamp, luster dust | Rustic, vintage style |
| 7. Painted with gel color | Easy-medium | 1-2 hours | Gel color, clear vanilla, brush | Watercolor effects, holidays |
| 8. Fondant cut-outs | Easy | None | Fondant, rolling pin, cutter | Sharp edges, character cookies |
| 9. Marbled with toothpick | Easy | 6-8 hours | Base icing, 2-3 colors, toothpick | Modern, abstract designs |
| 10. Holiday sprinkle mixes | Very easy | 30 minutes | Theme sprinkles, corn syrup | Christmas, Easter, Halloween |
| 11. Pressed sugar flowers | Easy | 6-8 hours | Sugar pearls, transfers | Weddings, tea parties |
| 12. Stenciled with luster dust | Easy-medium | 2-3 hours base | Stencil, luster dust, brush | Monograms, snowflakes, hearts |
1. Classic Royal Icing Flood Cookies
Royal icing flood is the gold standard of cookie decorating, and the technique every beginner should try at least once. You pipe a thick outline first to hold a border, then thin the same icing with water and flood the inside. The two-stage method gives you that crisp edge and smooth, glossy top you see on bakery cookies.
Mix 4 cups of confectioners’ sugar with 3 tablespoons of meringue powder and a half teaspoon of salt. Add 6 to 8 tablespoons of warm water and beat on low until smooth. Split the batch: leave one portion thick for outlining, and thin the other with teaspoon-by-teaspoon water until it ribbons off the spoon in 6 to 8 seconds. Tint each color with gel food coloring, then load into piping bags or squeeze bottles.
Trace the cookie edge with the thick icing, then immediately fill the center with the thinned flood. Use a toothpick to nudge icing into corners and to pop air bubbles. Tap the tray firmly on the counter three or four times to settle the surface, then leave the cookies alone to dry for 6 to 8 hours before stacking.
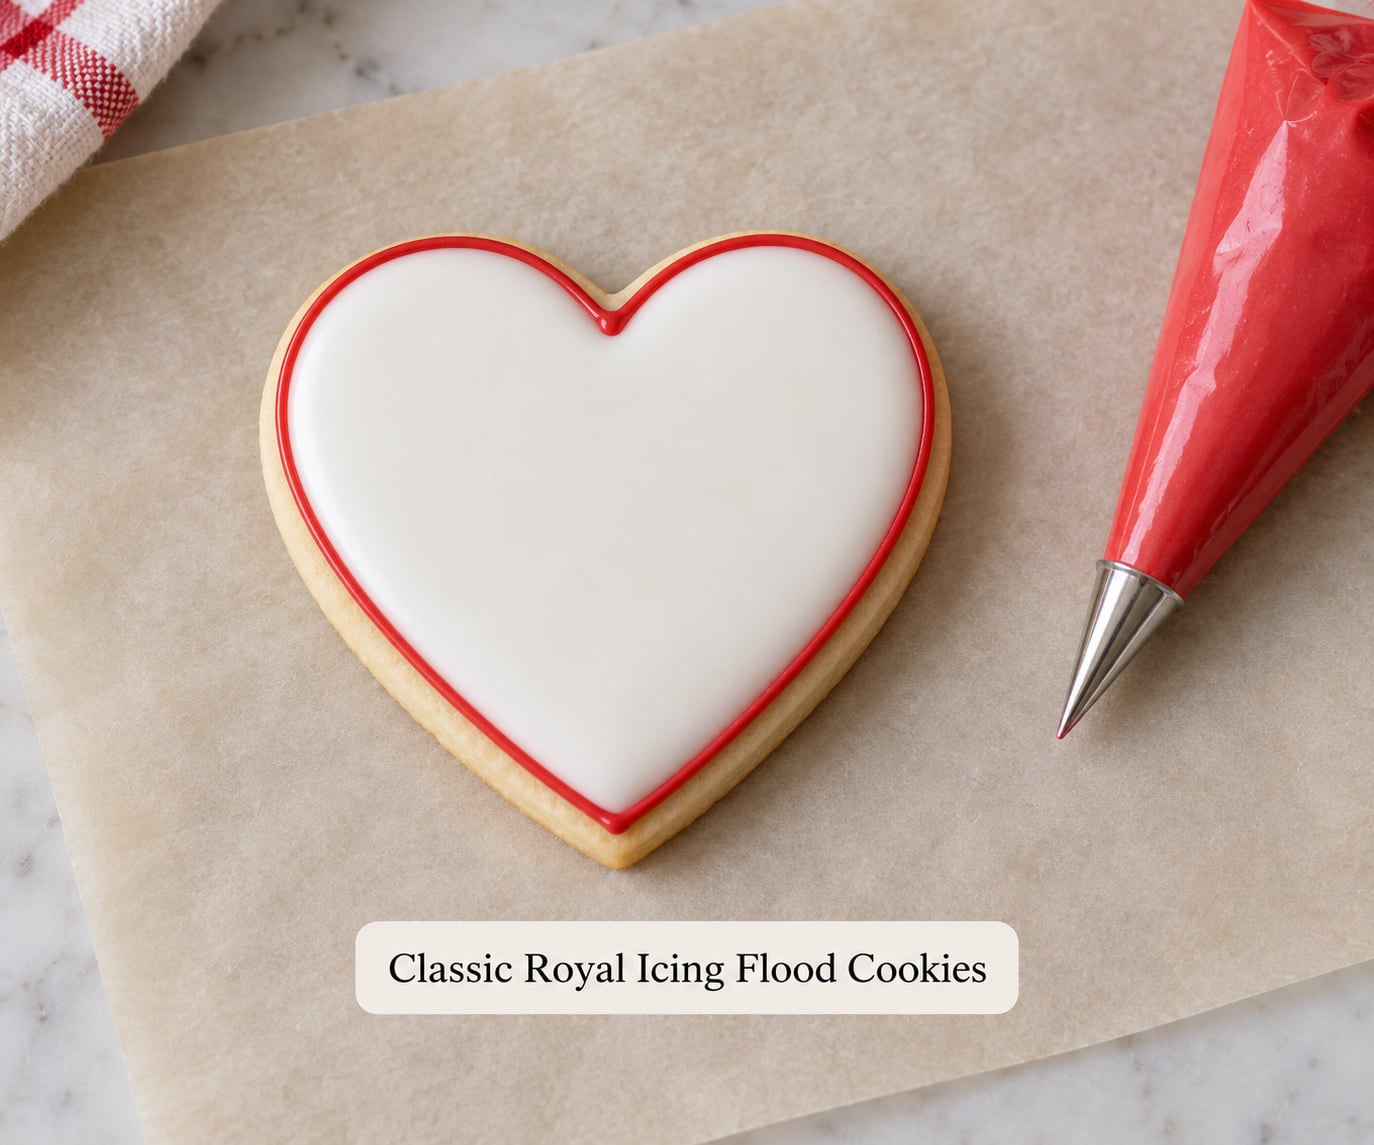
A squeeze bottle is easier than a piping bag for most beginners. The neck is wider, the flow is more controlled, and there is almost no hand cramping. Sally’s Baking Addiction has a good primer on flooding if you want a second look at the technique, and the Reddit r/Baking community regularly answers troubleshooting questions about royal icing consistency.
2. Dip-and-Spread Glaze Icing
Glaze icing is the fastest way to get a smooth, shiny finish on a sugar cookie, and the recipe lives in most pantries already. Whisk 2 cups of powdered sugar with 2 to 3 tablespoons of milk and a half teaspoon of vanilla until the mixture is smooth and falls in a thick ribbon. Add gel food coloring if you want a tint, or leave it white for a snowy look.
Hold a cooled cookie face-down over a small bowl, dip the top surface into the glaze, then lift it off and let the excess drip back into the bowl. Use a toothpick to pop bubbles and to push glaze into the edges before it starts to set. Add sprinkles, sanding sugar, or a drizzle of contrasting color within the first 30 seconds so everything sticks without sliding off.
The whole process takes about 5 minutes per dozen, and the glaze dries in 1 to 2 hours at room temperature. Glaze is softer than royal icing, so the cookies do not stack or travel as cleanly, but the taste is lighter and sweeter. For a last-minute birthday tray or a casual family night, this is the technique to use.
3. Buttercream Swirls and Rosettes
Buttercream is the forgiving icing. It does not need to hit a precise consistency, it does not crack when cookies shift in storage, and it tastes like frosting on a cupcake. Use a sturdy American buttercream (1 cup butter, 4 cups powdered sugar, 2 tablespoons milk, 1 teaspoon vanilla) so the swirls hold their shape instead of melting into a puddle.
Load the buttercream into a piping bag fitted with an open star tip like the Wilton 1M. Hold the bag straight up over the cookie, squeeze gently, and spiral inward to make a rosette. Pull straight up at the end to break the icing cleanly. For drop flowers, hold the bag perpendicular to the cookie, squeeze a small mound, then release with a tiny flick. The whole cookie can be covered in 30 seconds.
There is no drying time, so you can stack the cookies in a single layer right away. They will keep at room temperature for 3 to 4 days in an airtight container. If you have ever watched a cake-decorating show and wondered how the swirls look so even, this is the same technique at cookie scale.
4. Sprinkle-Only Decorating (No Skill Required)
Sometimes the smartest decorating move is the one that requires zero skill. Brush a thin layer of corn syrup, honey, or simple syrup onto a cooled cookie, then press the cookie face-down into a plate of sprinkles. Lift it off, shake off the excess, and you have a fully decorated cookie in under a minute.
Use this method for kid parties, classroom Valentine exchanges, and any batch where volume matters more than detail. A single bag of jimmies, a small jar of sanding sugar, and a bottle of corn syrup will decorate 4 to 5 dozen cookies. The cookies can be made and decorated the day before, which is a big help on busy weeks.
For best results, match the syrup to the cookie: corn syrup is the clear winner for a glossy, neutral finish, while honey adds a faint golden tint and a touch of flavor. If you want a flavored base, a thin layer of melted white chocolate works too, though it needs 15 minutes to firm up before stacking.
5. Edible Marker Doodles
Food-safe edible markers turn a tray of plain iced cookies into personalized gifts in a few minutes. Use them on fully dried royal icing, fondant, or even a thick layer of glaze. They come in fine tip and broad tip, and a basic 4-pack of primary colors is enough to write names, draw faces, or add monograms.
The trick is patience at the start. Let the base icing dry for 2 to 3 hours first. If you draw on wet icing, the color bleeds and your lines turn fuzzy. Press the marker tip lightly and move in short strokes rather than one long sweep. A second coat makes the lines darker once the first pass has dried for a minute.
Edible markers are a great way to involve kids who do not have the patience to wait for icing to flood. Hand them a stack of plain cookies and let them draw their own designs. The markers wash off the skin with soap and water, and most are certified kosher, gluten-free, and allergen-friendly.
6. Stamped Cookies with a Cookie Stamp
A cookie stamp is a wooden or silicone press that leaves a raised design in the dough before baking. Press the stamp into the rolled dough the same way you would a cookie cutter, then cut around the edge and bake. The impression stays sharp through baking when the dough is chilled first, and the design shows on every single cookie with zero piping.
After baking, you can leave the cookies plain for a rustic, Scandinavian look, or brush the raised surface with edible luster dust for a metallic finish. A soft brush like a clean eyeshadow brush or a small food-only paintbrush works better than a stiff one. Tap the brush into the dust, then sweep it across the cookie in light strokes.
Cookie stamps come in hundreds of designs, from snowflakes to anchors to monograms. The Crafting Foodie regularly tests new stamp styles in our holiday roundups, and a single stamp can produce an entire themed batch in under an hour. If you want an elegant cookie with almost no effort, this is the method.
7. Painted Cookies with Gel Food Coloring
Edible painting turns royal-iced cookies into tiny canvases. Mix a few drops of gel paste color with a half teaspoon of clear vanilla extract or clear lemon extract to make edible paint. Brush the mixture onto fully dried royal icing in thin layers, letting each layer dry for 5 to 10 minutes before adding the next.
Use a small food-only brush, and keep a cup of clean water nearby for rinsing between colors. A fan brush works well for sky and watercolor effects, while a flat shader brush is better for filling in monograms and letters. The first coat will look pale, but two to three coats build up to a deep, saturated color.
This technique shines for holiday motifs: a snowy pine branch, a watercolor rose, a galaxy background. It also lets you match school colors, wedding palettes, or birthday themes without buying a dozen bottles of tinted icing. If you have ever wanted to paint but felt intimidated by a blank canvas, a cookie is a great place to start.
8. Fondant Cut-Outs and Layered Shapes
Fondant gives you sharp, clean edges that icing alone cannot match. Roll pre-colored or homemade fondant to about an eighth of an inch thick, cut it with the same cookie cutter you used for the dough, and lay the cut-out on top of the cookie. Brush a thin layer of water or piping gel on the cookie first so the fondant sticks without sliding.
Layer two or three fondant shapes for a dimensional look: a small heart on top of a large heart, a star on top of a circle. The technique is forgiving because you can lift and reposition the fondant for the first minute or so. Once it sets, it stays put, and there is no drying time before stacking.
Fondant tastes sweet but a little chalky if you use the cheap stuff. Satin Ice and Fondarific are two brands that home bakers consistently rate as the best-tasting options. If you want to skip fondant entirely, a thin layer of rolled marzipan gives the same look with an almond flavor that pairs beautifully with sugar cookies.
9. Marbled Icing with a Toothpick
Marbling is the easiest way to get a designer look on a flooded cookie. Flood the cookie in a base color, then drop 4 to 6 small dots of 2 or 3 contrasting colors on top. Drag a toothpick through the dots in long S-curves, spirals, or zigzags to create a marbled effect. The whole design takes about 20 seconds per cookie once you have the rhythm.
The trick is timing. Drop the color dots while the base flood is still wet, ideally within the first 30 seconds. If the base has started to set, the toothpick drags icing off the surface instead of moving it. Work in small batches: flood 3 to 4 cookies, marble them, then flood the next batch.
For a clean finish, drag the toothpick from edge to edge in one motion and lift straight up at the end. If you make a mistake, smooth the icing back flat with a wet fingertip and start over. Once the marbled icing dries for 6 to 8 hours, it sets into a hard, glossy surface that holds its pattern even when the cookies are stacked.
10. Holiday and Seasonal Sprinkle Mixes
Sprinkle blends do the theme work for you. Red, white, and green mixes for Christmas; pastels and bunny shapes for Easter; orange and black for Halloween; red and pink hearts for Valentine’s Day. Match a sprinkle blend to the occasion, and a plain glazed cookie becomes a holiday cookie without any piping at all.
You can buy pre-mixed themed sprinkles from most grocery stores, or build your own. A good DIY ratio is 2 parts jimmies to 1 part nonpareils to 1 part sanding sugar, plus a handful of shaped sprinkles if you want extra personality. Mix in a bowl, then press onto a syrup-coated or wet-iced cookie.
For a more polished look, flood the cookie in white first, then add the themed sprinkles while the icing is still wet. The white base makes the colors pop. For a more rustic look, press the sprinkles directly onto a glaze or buttercream surface. Either way, the cookies photograph beautifully and travel well in a single layer in a box.
11. Pressed Sugar Flowers and Sugar Pearls
Sugar pearls and pre-made royal icing flowers look like they took hours, but they go onto a cookie in seconds. Flood the cookie in a base color, then press 3 to 7 sugar pearls into the wet icing in a cluster, line, or border. For sugar flowers, lay a single transfer in the center of the wet icing and let the icing ooze up around the edges to hold it in place.
Work fast: place each piece within 30 seconds of flooding. After that, the icing starts to skin over and the pearl or flower will not stick. A pair of tweezers helps place tiny pieces precisely, and a light touch is all you need. Press straight down, then release straight up so the icing does not pull away with your finger.
This style is the easiest way to get a wedding-cookie or tea-party look without any piping skills. The pressed pieces are sold in bulk at craft stores and online, and a small bag will decorate 4 to 6 dozen cookies. Pair it with a flood base in soft white, blush, or pale blue, and the cookies look like they came from a professional bakery.
12. Stenciled Cookies with Luster Dust
Stenciling is the fastest way to get a polished, repeatable design on a dozen cookies. Lay a food-safe stencil (plastic or acetate) flat on top of a fully dried royal-iced cookie, then brush edible luster dust or petal dust over the cutout. Lift the stencil straight up, and the design stays on the cookie in a clean metallic finish.
Use a soft brush, tap off the excess dust, and sweep the brush across the stencil in light strokes. Pressing too hard pushes dust under the stencil edges and blurs the design. For a two-tone effect, stencil a second color in a different part of the cookie after brushing off the first. Pearl, gold, and silver are the classic dust colors, and they catch the light beautifully.
Stencils come in monograms, snowflakes, lace, hearts, and geometric patterns. A single snowflake stencil will decorate 30 to 40 cookies in an hour, which makes this the most efficient method for large holiday batches. The dust is flavor-neutral, so the cookies still taste like the icing underneath.
Frequently Asked Questions
Do sugar cookies need to be completely cool before decorating?
Yes, always. Warm cookies will melt royal icing, slide glaze off the surface, and make buttercream go greasy. Let the cookies cool on the baking sheet for 5 minutes, then move them to a wire rack for at least 1 hour. The cookie should feel room temperature to the touch before any icing touches it, or the finish will never set properly.
Can you freeze sugar cookies after they are decorated with royal icing?
Yes, and it is the best way to get ahead on holiday baking. Let the royal icing dry fully for at least 8 hours, then layer the cookies between sheets of parchment in an airtight container. They freeze well for up to 3 months. Thaw in the container at room temperature for 1 to 2 hours so condensation forms on the outside of the box, not on the icing surface.
What is the easiest icing for beginners to use on sugar cookies?
Glaze icing is the easiest by far, with just powdered sugar, milk, and vanilla. Royal icing is the next step up and gives a harder, more polished finish. Buttercream is the most forgiving of all and tastes like cupcake frosting, but it never fully hardens. For most beginners, starting with glaze and working up to royal icing is a natural path.
How long do decorated sugar cookies stay fresh at room temperature?
Royal icing cookies stay fresh for 2 to 3 weeks in an airtight container at room temperature. Glaze cookies last 5 to 7 days. Buttercream cookies keep for 3 to 4 days. Always store them in a single layer or between sheets of parchment, and keep them out of direct sunlight, which can fade gel colors within hours.
How far ahead of a party can I decorate sugar cookies?
Royal icing cookies can be decorated up to 3 weeks ahead and stored in an airtight container. Glaze cookies are best within 2 to 3 days of the event. Buttercream cookies are best within 24 hours because the frosting can pick up fridge odors. For a stress-free party week, freeze baked undecorated cookies up to 2 months ahead and decorate them 3 to 5 days before.
What is the best food coloring to use for cookie decorating?
Gel paste colors like Americolor and Wilton Gel are the best for cookie icing. They are concentrated, so a tiny drop colors a whole batch, and they do not water down royal icing the way liquid food coloring does. Avoid liquid food coloring from the grocery store baking aisle, which adds too much moisture and prevents icing from setting.
Start Decorating Tonight
Pick one technique from this list, gather the supplies you already have, and decorate a single batch tonight. The fastest way to learn cookie decorating is to make a small mess and eat the results, then try a second style the next weekend. Most beginners find their footing in glaze and sprinkles within an hour, then graduate to royal icing floods once they have a few batches under their belt.
Keep these 12 sugar cookie decorating ideas for beginners in your back pocket for every holiday batch from now on. The same methods that work for a Tuesday afternoon also work for Christmas cookies, baby shower favors, and end-of-year teacher gifts. A simple tray of decorated cookies is one of the easiest homemade gifts you can make, and almost always the one people remember.