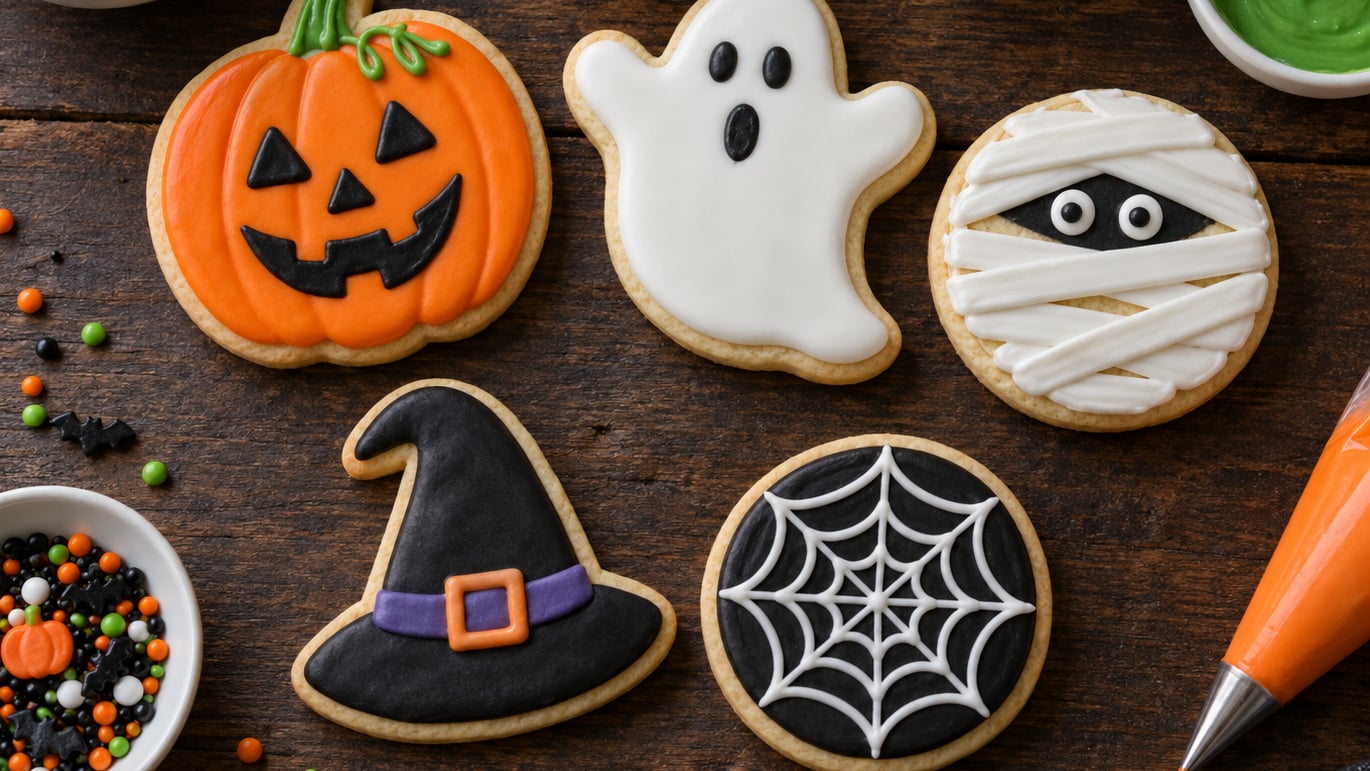
Halloween sugar cookie decorating ideas don’t have to be complicated to look great on a party tray. With a simple sugar cookie, a few batches of colored icing, and the right cookie cutter, anyone can turn out spooky treats that kids and adults actually want to eat. This roundup walks through 16 designs, ordered from easiest to most advanced, so you can pick the level that fits your night.
You don’t need a pastry degree or fancy equipment to pull these off. Most use a basic royal icing or candy melts, a piping bag (or a zippered sandwich bag with a corner snipped off), and whatever Halloween cookie cutters you have in the drawer. I’ll flag the ones that need special tools, and call out the truly kid-friendly designs so the little ones can take over.
I’ve decorated hundreds of holiday cookies over the years, including more than a few lopsided pumpkins and bleedy ghosts, and the truth is that relaxed decorating always wins. Pick one or two ideas from this list, set out the icing, and let everyone have fun.
Table of Contents
- Easy Halloween Sugar Cookie Decorating Ideas: Quick Guide
- 1. Classic Jack-O-Lantern Face Cookies
- 2. Ghost Sugar Cookies
- 3. Mummy Wrapped Cookies
- 4. Witch Hat Cookies
- 5. Black Cat Silhouette Cookies
- 6. Spider Web Cookies
- 7. Bat Wing Chocolate-Dipped Cookies
- 8. Frankenstein Monster Cookies
- 9. Candy Corn Layered Cookies
- 10. Bloody Knife and Splatter Cookies
- 11. Skeleton Skull Cookies
- 12. Monster Eye Ball Cookies
- 13. Vampire Fang Cookies
- 14. Pumpkin Patch Cookies
- 15. Glow-in-the-Dark Neon Cookies
- 16. Haunted House Scene Cookies
- Frequently Asked Questions
- What is the best icing to use for Halloween sugar cookies?
- How long does it take for royal icing to dry on sugar cookies?
- Can I make Halloween sugar cookies ahead of time?
- How do I keep icing colors from bleeding into each other?
- What is the easiest Halloween cookie design for kids to decorate?
- How should I store decorated Halloween sugar cookies before the party?
- Conclusion
Easy Halloween Sugar Cookie Decorating Ideas: Quick Guide
Here’s a quick side-by-side so you can match each design to your time and skill level. Difficulty is rated for a confident home baker who’s never piped before.
| # | Design | Difficulty | Time per cookie | Main supplies | Best age group |
|---|---|---|---|---|---|
| 1 | Jack-O-Lantern Face | Easy | 5 min | Round cutter, orange and black icing | All ages |
| 2 | Ghost | Easy | 5 min | Ghost cutter, white icing, black icing | All ages |
| 3 | Mummy Wrapped | Easy | 6 min | Rectangle cutter, white icing | 5+ |
| 4 | Witch Hat | Easy | 7 min | Witch hat cutter, chocolate, sprinkles | 6+ |
| 5 | Black Cat Silhouette | Medium | 8 min | Cat cutter, fine tip, green and pink icing | 8+ |
| 6 | Spider Web | Medium | 10 min | Round cutter, white and black icing, toothpick | 8+ |
| 7 | Bat Wing Chocolate-Dipped | Easy | 4 min | Candy melts, round cookie, sprinkle wings | 4+ |
| 8 | Frankenstein Monster | Medium | 9 min | Rectangle cutter, green and black icing, candy bolts | 7+ |
| 9 | Candy Corn Layered | Medium | 8 min | Triangle cutter, yellow, orange, white icing | 6+ |
| 10 | Bloody Knife and Splatter | Medium | 10 min | Long rectangle cutter, gray, brown, red icing | 10+ |
| 11 | Skeleton Skull | Medium | 9 min | Skull cutter, white and black icing, fine tip | 8+ |
| 12 | Monster Eye Ball | Easy | 6 min | Round cutter, white icing, colored icing, black gel | 5+ |
| 13 | Vampire Fang | Medium | 8 min | Shield cutter, white icing, thick red icing | 8+ |
| 14 | Pumpkin Patch | Easy | 7 min | Small pumpkin cutter, orange and green icing | 5+ |
| 15 | Glow-in-the-Dark Neon | Easy | 6 min | Bone or tombstone cutter, neon gel colors, black light | All ages |
| 16 | Haunted House Scene | Hard | 20+ min | House cutter, multiple icing colors, candy accents | 10+ |
1. Classic Jack-O-Lantern Face Cookies
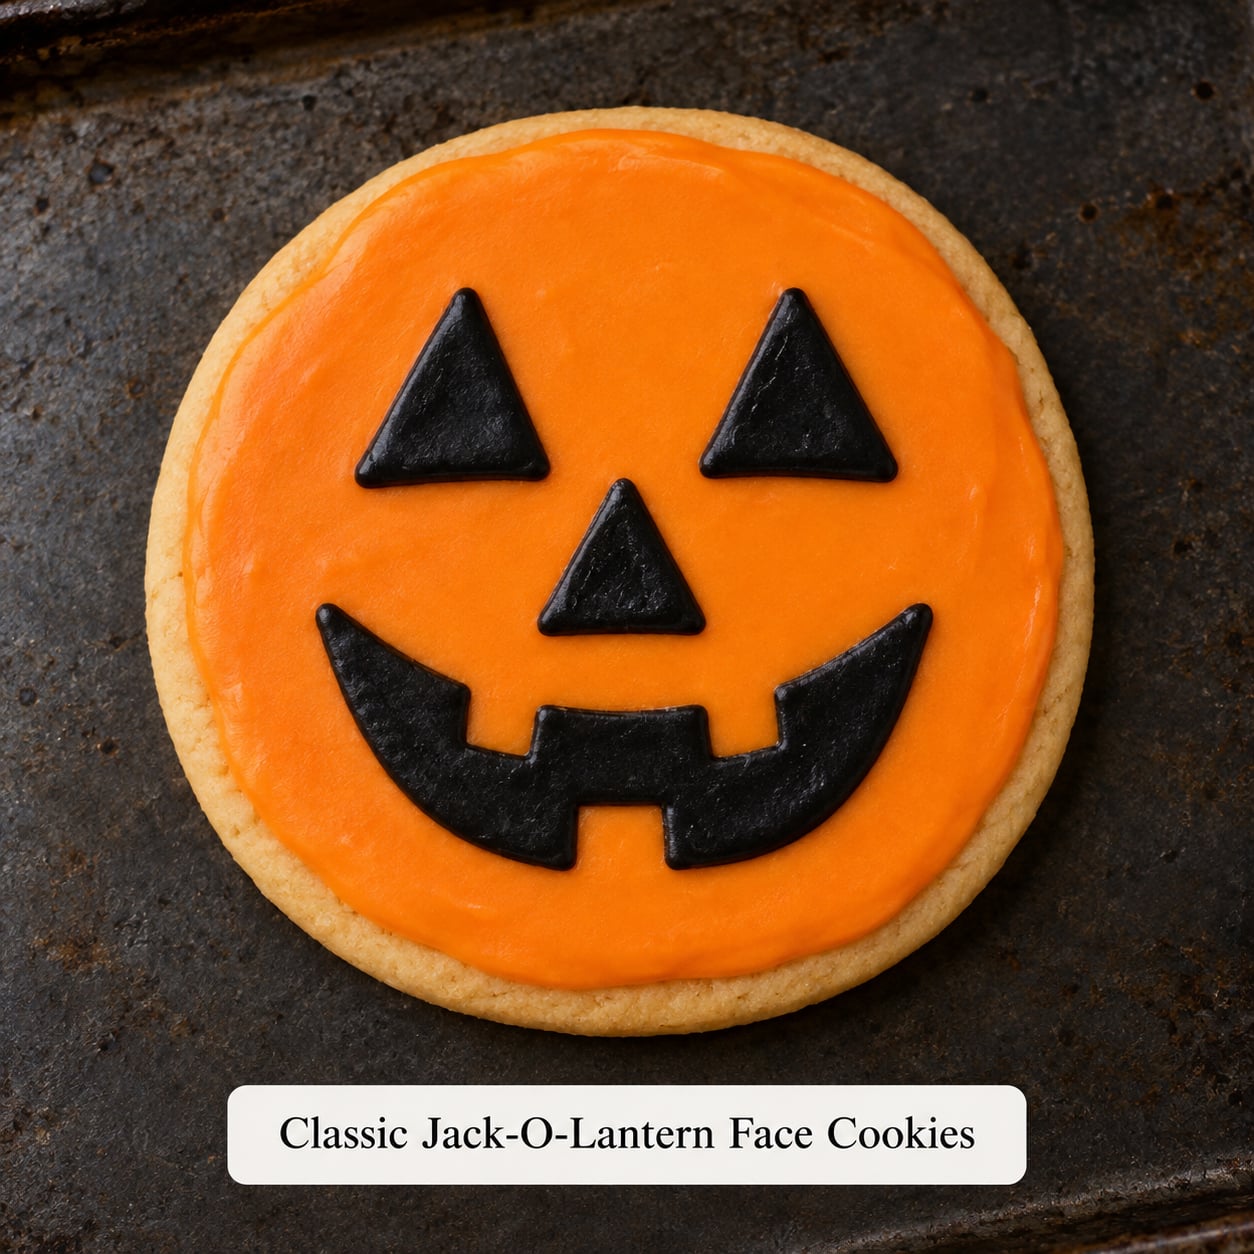
The pumpkin face is the gold-standard Halloween sugar cookie decorating idea for a reason: it only takes two colors, the design forgives crooked lines, and kids genuinely love eating them. Use a 2.5 to 3 inch round cutter, flood the cookie with orange icing (flooding means letting the icing flow to fill the shape on its own), then let it dry for about 15 minutes.
Once the orange base is set, fill a small piping bag fitted with a #2 round tip with black icing. Pipe two triangle eyes, a small triangle nose, and a jagged grin. Keep the lines confident and quick — hesitating leaves dots. If you mess up a line, let it dry and pipe right on top.
This is the design I’d hand to a first-time decorator. The face can be smiling, scary, surprised, or silly, and it still reads as Halloween. Set out orange and black icing in squeeze bottles for the youngest kids, and let them do the whole thing themselves.
2. Ghost Sugar Cookies

Ghosts look harder than they are, because the white flood is the entire cookie. Cut ghost shapes with a metal cutter (or trace a small ghost template and cut with a knife), then flood with thinned white royal icing. Use a toothpick to nudge the icing into the wavy bottom edge so it doesn’t pool.
After 30 minutes of drying, the ghost is ready for its face. With black icing in a #1.5 round tip, pipe two round dots for eyes and a small oval mouth. That’s it. If you want a sweet ghost instead of a scary one, make the eyes bigger and round, with a tiny “o” mouth.
Tip: a slightly thicker white icing gives the ghost a clean, crisp edge. Too-thin icing runs and turns your ghost into a puddle by the time you set down the bag. Stir, then count to 15 while lifting a spoonful of icing — if the icing dissolves into the rest in about 15 seconds, you’re at the right consistency.
3. Mummy Wrapped Cookies
Mummies are forgiving by design. The bandage strips don’t have to be straight, and the messier they are, the better they look. Cut rectangles about 3 inches long and 1.5 inches wide, then flood the whole cookie with a thin coat of off-white or pale gray icing.
While the base is still wet, fill a piping bag with thicker white icing fitted with a #3 round tip. Pipe thin diagonal lines back and forth across the cookie, leaving a small open area near the top for the eyes. Let the strips overlap a bit, and don’t worry about gaps.
Once the strips dry (about 10 minutes), pipe two small black dots in the open space for eyes. A toothpick rescues mistakes fast: if a strip goes where you don’t want it, drag a clean toothpick through the icing before it sets to lift the line off.
4. Witch Hat Cookies
Witch hats look impressive and only take a few minutes per cookie. The trick is to bake the cookies with a witch hat cutter and decorate the brim and the cone separately. Start by flooding the brim (the flat bottom part) with chocolate icing or a chocolate glaze.
For the cone, dip the top of each cookie into melted chocolate candy melts (dark or milk chocolate both work), or pipe chocolate icing down from the tip. While the chocolate is still wet, add a colorful band of icing around the base of the cone — orange, purple, or green all look great.
Finish with a small dot of yellow or gold icing in the center of the band for the buckle. If you don’t have a witch hat cutter, a large circle plus a triangle works fine. The whole cookie can be decorated in under 7 minutes once the chocolate is melted.
5. Black Cat Silhouette Cookies
Black cats are dramatic and the cookies disappear fast off a Halloween platter. Use a cat-shaped cutter (or hand-cut a cat silhouette with a sharp knife and a paper template), and flood the entire cookie with black icing. Black icing usually needs to be a touch thicker than other colors because the tint affects the flow.
Once the black base sets (about 20 minutes), use a fine tip — #1 or #1.5 — with green icing for the eyes and pink icing for the inner ears. Two small round dots work for eyes, and a tiny crescent or triangle for each ear gives the cat personality.
If the outline gets fuzzy while flooding, lightly drag a damp (not wet) brush along the edge to clean it up. Keep one brush and a small bowl of water nearby for this — it rescues more cookies than any piping tip ever will.
6. Spider Web Cookies
Spider webs are a great intro to the wet-on-wet technique. Cut 3 inch rounds, flood with white icing, and let the base set just until the surface is no longer liquid — about 5 to 10 minutes. The icing should feel firm but still slightly tacky.
Fit a piping bag with a small round tip and fill with black icing. Pipe three concentric rings on top of the white base, starting near the edge and working inward. Then drag a toothpick or a scribe tool from the center of the cookie outward through the rings, wiping the toothpick between drags. This pulls the black into clean web lines.
Add a small spider last: pipe a round black body in the corner, then drag a fine tip outward in eight short lines for legs. Kids love adding the spider the most — let them name it before it goes on the cookie.
7. Bat Wing Chocolate-Dipped Cookies
If you only have round cookie cutters, bats are still on the menu. Bake 2.5 inch rounds, melt a cup of black candy melts in the microwave in 20 second bursts, and dip half of each cookie into the chocolate.
Lay the dipped cookies on parchment and immediately press two chocolate sprinkle “wings” into the soft chocolate on each side. You can use chocolate sprinkles for tiny wings or chocolate cereal pieces for bigger ones. Pop the tray into the fridge for 5 minutes to firm up.
For ears, add two small candy eyes or piped dots of white and black icing to the un-dipped half. This is one of the easiest designs on the list — kids can do the dipping and wing placement themselves, and the only adult job is the microwave step.
8. Frankenstein Monster Cookies
Frankenstein cookies are rectangle-shaped cookies iced green with a black hair line and a stitched scar. Cut 2 by 3 inch rectangles, flood with green royal icing, and let it dry for 15 minutes.
With a fine tip and black icing, pipe a jagged hairline across the top of the cookie, then add two small dots for eyes. For the stitched scar, pipe a short diagonal line across one cheek, then add tiny perpendicular dashes across it like a sewn wound.
Place two small silver candy balls (edible sugar pearls or chocolate-covered candies) on either side of the cookie near the bottom to look like neck bolts. Kids love this part — give them a small bowl of bolts and let them put two on every cookie.
9. Candy Corn Layered Cookies
Candy corn is the unofficial mascot of the season, and it translates beautifully to a triangle cookie. Cut 2.5 inch triangles, then divide your icing into yellow, orange, and white. Pipe a small yellow dot at the tip of each triangle and use a toothpick to drag it down into a thin point.
Right below the yellow, pipe a band of orange icing, then a band of white at the base. While everything is wet, use a toothpick to lightly blend the seams where the colors meet so you get a soft gradient instead of hard lines.
If a layer leans to one side, gravity is your friend — gently rotate the cookie while the icing is still wet, and the icing will flow back toward center. Don’t try to fix it once it’s set, or you’ll chip the surface.
10. Bloody Knife and Splatter Cookies
Bloody knife cookies are a slightly cheekier design that tweens and teens love. Cut long rectangles about 4 inches long and 1 inch wide. Flood the top half with light gray icing for the blade and the bottom half with brown icing for the handle, blending the seam slightly.
Once the base sets, the fun part: flicking red icing for splatter. Hold a small new paintbrush (one you don’t use for anything else) loaded with thinned red icing about 6 inches above the cookie, then run your thumb across the bristles to flick droplets across the blade. Cut a small piece of cardboard to shield the rest of the cookie from overspray.
This one is best for older decorators — younger kids find the flicking step frustrating. Pre-flicked blades with clean-up work for younger hands.
11. Skeleton Skull Cookies
Skull cookies look intricate but break down into a few simple shapes. Cut skull shapes with a metal cutter, flood with white icing, and let dry 20 minutes.
Use a fine #1 tip with black icing to pipe two large round eye sockets, a small triangle nose, and a row of small square teeth across the mouth. The teeth are the part that looks hard but is actually the easiest: pipe one long horizontal line, then drag a toothpick down through it at even intervals to create individual teeth.
If an eye socket looks rough, smooth the wet icing using a clean damp brush in tiny circles. Skulls work beautifully in a batch — make a dozen with the same face, and they look like a coordinated set.
12. Monster Eye Ball Cookies
Eyeball cookies are gross in the best way. Cut rounds, flood with white icing, and let it dry 15 minutes.
Once the white sets, pipe a colored iris in the center of each cookie — try blue, green, yellow, or red for variety. Then add a smaller black pupil on top of the iris.
The single tip that makes eyeballs look alive: a tiny dot of white icing or white gel for the highlight, placed at the top corner of the pupil. It’s one extra step that takes 2 seconds and instantly makes the eye look shiny and realistic. Use different highlight positions to make each eyeball look in a different direction.
13. Vampire Fang Cookies
Vampire cookies are a slightly sweet design that’s good for a grown-up Halloween party. Cut shield shapes (or rounded rectangles work fine), flood with white icing, and let dry.
Fit a piping bag with a small round tip and fill with a slightly thick red icing — the trick to drips that hold their shape is icing that’s a touch stiffer than your usual flood. Pipe two small red dots at the top edge of the cookie, then drag each one downward with a toothpick to create a long drip.
Below the drips, pipe two small white triangles for fangs. The fangs should point downward from where you’d imagine a mouth to be. If your red icing is too thin, the drips will run all the way down the cookie before they dry. Add more powdered sugar to thicken if that happens.
14. Pumpkin Patch Cookies
Pumpkin patch cookies are a sweet, harvest-style design that works for Halloween parties and fall gatherings. Cut small pumpkin shapes with a 1.5 to 2 inch cutter, flood with orange icing, and let dry 15 minutes.
Add a small green stem on top with a #2 tip. For the curly tendril, pipe a thin green line upward from the base of the stem, then lightly drag a toothpick in a circular motion through the wet icing to create the curl. One quick swirl motion is all it takes.
For batch decorating, pipe all the stems first, then all the tendrils — moving from one step to the next across every cookie on the tray is faster than finishing each one fully. A tray of ten pumpkins takes about ten minutes this way.
15. Glow-in-the-Dark Neon Cookies
Glow-in-the-dark cookies are an instant kid favorite and surprisingly easy to make. The trick is gel food coloring — liquid colors won’t glow. Cut bone, eyeball, or tombstone shapes, and mix small batches of royal icing with neon pink, green, blue, or purple gel colors.
Outline and flood as usual, but let the cookies dry for at least an hour. The longer they dry, the better they glow. When it’s time to serve, dim the lights and hold a small black light over the tray — the icing lights up brilliantly.
This is the one where kids go wild. Pre-bake and ice the cookies during the day, then bring them out under a black light at the party. A small battery-powered black light is cheap, easy to find online, and reusable for years of glow parties.
16. Haunted House Scene Cookies
Haunted house cookies are the most advanced design on this list, but they’re also the showstopper. Cut house shapes with a haunted house cutter (these usually come as part of a Halloween cookie cutter set). Plan on 20 minutes per cookie and accept that the first three will look rough.
Flood the walls with gray icing and the roof with black. Once dry, add small candy pumpkins around the base for bushes, and a yellow candy or a dot of yellow icing in the sky for a moon. Add tiny windows with yellow icing dots and a black door on the front.
This is the design to save for a multi-hour decorating party with friends or older kids. Set out every color you have, put on a Halloween playlist, and let everyone build their own version of the same house — no two will look alike.
Frequently Asked Questions
What is the best icing to use for Halloween sugar cookies?
Royal icing is the most popular choice for Halloween sugar cookies because it dries hard, holds fine details, and keeps colors crisp. It also stores well at room temperature for a week or two. Buttercream is softer and tastes great, but it smudges easily and doesn’t hold piped details as cleanly.
How long does it take for royal icing to dry on sugar cookies?
Royal icing dries to the touch in about 30 minutes, but it needs 6 to 8 hours to fully harden before stacking or storing. Flooded cookies need longer than outlined ones. If you’re layering colors with the wet-on-wet technique, work in 5 to 10 minute windows before the base sets.
Can I make Halloween sugar cookies ahead of time?
Yes. The cookies themselves can be baked 1 to 2 weeks ahead and frozen in an airtight container, then thawed the night before decorating. Decorated cookies keep well at room temperature for up to 2 weeks, so you can finish decorating a full week before Halloween without any quality loss.
How do I keep icing colors from bleeding into each other?
Let each color dry fully before adding the next. A good rule is to wait at least 30 minutes between a flood layer and any detail work on top of it. Gel food coloring also helps — it gives bright colors with less liquid, which means less bleeding between layers.
What is the easiest Halloween cookie design for kids to decorate?
Jack-o-lantern faces and ghost cookies are the easiest designs for kids. Both only need two colors, the shapes are forgiving of crooked lines, and even the simplest version still reads as Halloween. Set the icing out in squeeze bottles so small hands don’t have to fight with a piping bag.
How should I store decorated Halloween sugar cookies before the party?
Once the icing is fully dry, store cookies in a single layer in an airtight container at room temperature. If you need to stack them, place a sheet of parchment between each layer. Avoid the fridge, since condensation can make royal icing sticky and dull the colors.
Conclusion
If this is your first batch, start with the jack-o-lantern faces. Bake a tray of rounds, mix one bowl of orange icing and one of black, and let everyone at the table pipe their own face. You’ll have a tray of twenty unique pumpkins in under an hour, and you’ll have learned every skill you need to try the more advanced designs later in the week.
The best Halloween sugar cookie decorating ideas are the ones that match your night. A quiet evening with one batch of ghosts is just as much of a win as a full haunted house party with twelve designs. Make what you’ll actually eat, share the rest, and save the tricky techniques for 2026 when you’ve got a real reason to commit.