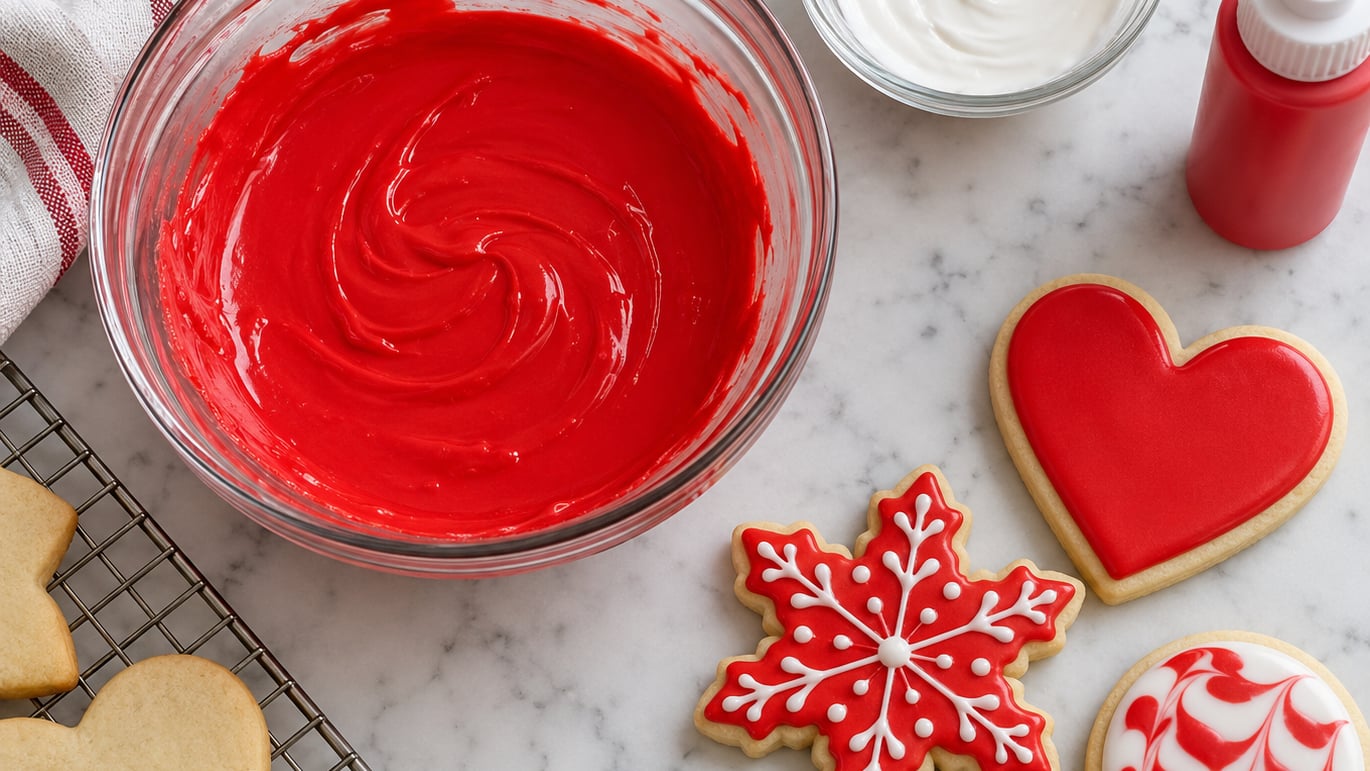
Red royal icing should look like a ripe cherry, not a faded strawberry. If you’ve ever piped a “red” batch that dried pink, or added so much food coloring that it tasted bitter, the problem isn’t your mixing — it’s the dye, the base, and how long the icing rests before it hits the cookie. This guide walks you through a reliable method for how to make red royal icing that holds its color from the first cookie to the last one on the tray.
You’ll start with a standard royal icing base, then color it with gel (not the watery drops), stop one shade lighter than you think, and let it rest so the pigment develops. Plan on 20 minutes of active work plus 1 to 12 hours of rest, and you’ll have icing that pipes smooth and dries to a true holiday red.
Table of Contents
- What You Need
- Step-by-Step: How to Make Red Royal Icing
- Common Mistakes (and How to Fix Them)
- Pro Tips for a True Holiday Red
- Frequently Asked Questions
- Does red royal icing taste different from white royal icing?
- Can I make red royal icing without eggs?
- How long does red royal icing take to dry on cookies?
- Why does my red royal icing look orange after it dries?
- How far in advance can I make red royal icing?
- What is the best red food coloring for royal icing?
What You Need
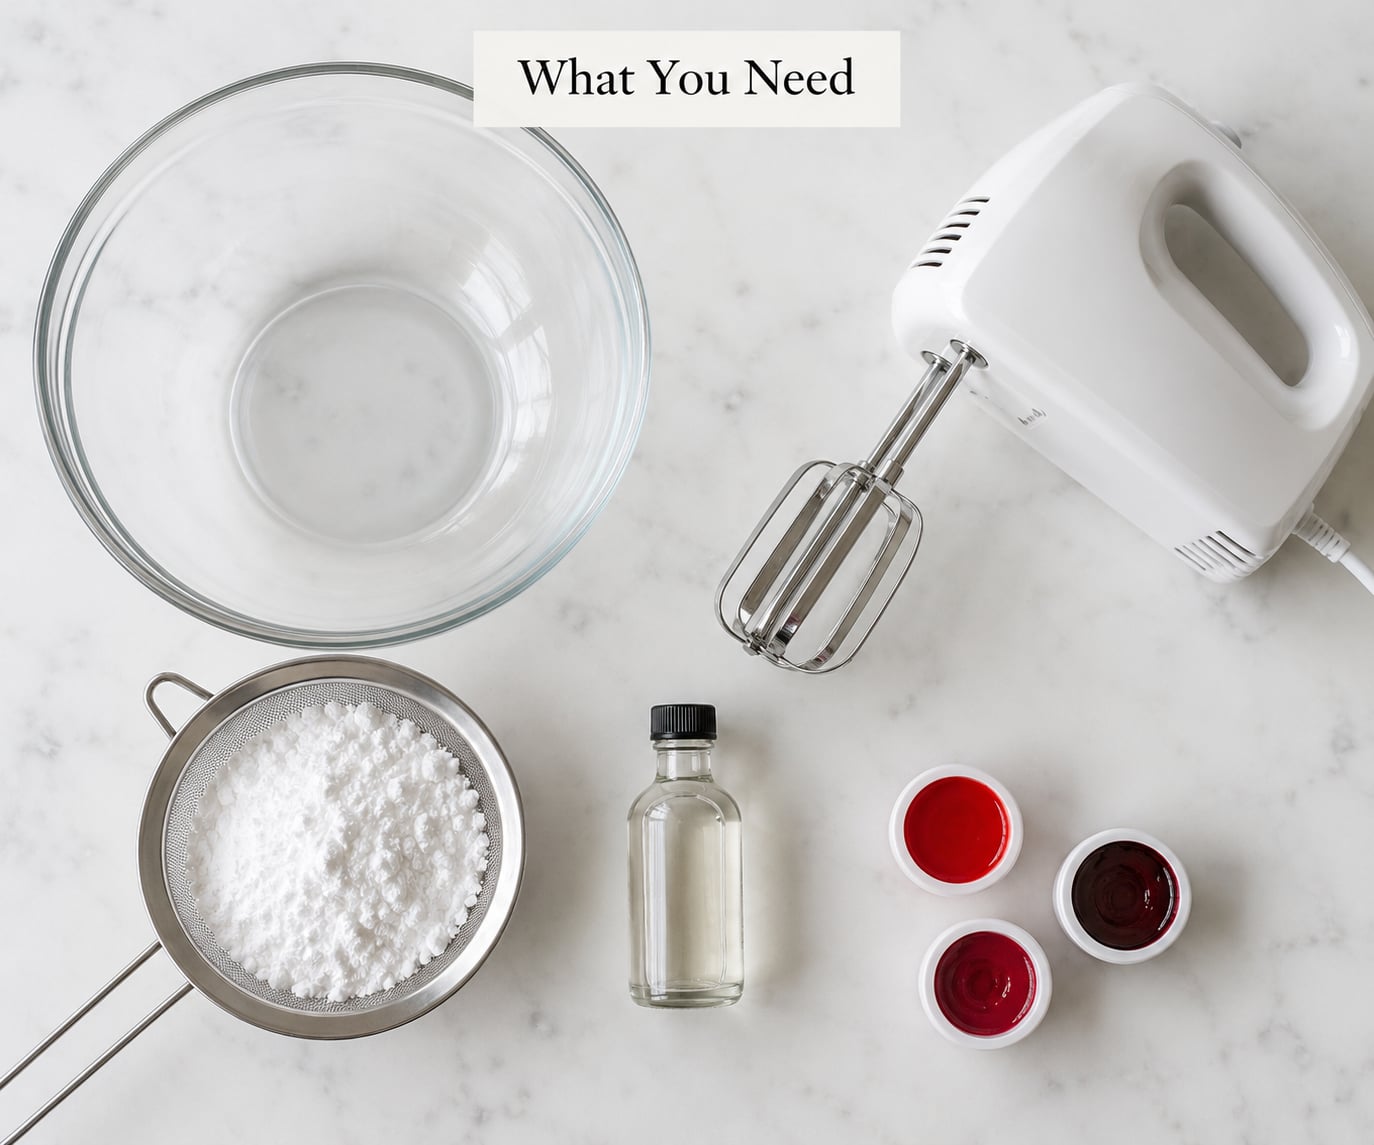
Gather these before you start. Royal icing waits for no one once the sugar hits the meringue, so having everything ready makes the difference between a smooth batch and a lumpy one.
For the base royal icing:
- 4 cups (about 1 lb) of sifted powdered sugar
- 3 tablespoons meringue powder
- 1 teaspoon clear vanilla extract (clear, not brown, so it doesn’t tint your base)
- 5 to 6 tablespoons warm water, added slowly
- A pinch of salt to balance the sweetness
For the red color:
- Gel or paste food coloring in red — Americolor Super Red, Chefmaster Red-Red, or Sugar Art Master Elite are the three cookie decorators reach for most
- A toothpick or small plastic pick for adding color in tiny amounts
Tools:
- Stand mixer or electric hand mixer (a whisk and bowl will work but takes much longer)
- Fine-mesh sieve for sifting the powdered sugar
- Piping bags, couplers, and piping tips (a #2 round for outlining, #3 for flooding)
- A few squeeze bottles if you prefer flooding from a bottle
- Airtight containers or bowls with tight lids
- Plastic wrap pressed directly onto the surface of any stored icing
If you don’t have a base recipe memorized, this one makes enough icing for about 24 to 30 medium sugar cookies, with separate bowls for outlining (stiff) and flooding (thinner).
Step-by-Step: How to Make Red Royal Icing
The whole process breaks into three stages: make the white base, color it red, then thin it for piping. Don’t try to color and thin at the same time — it makes it almost impossible to fix the consistency later.
- Sift the powdered sugar. Run it through a fine-mesh sieve into your mixer bowl. Skipping this step is the single biggest reason for lumpy icing.
- Add the meringue powder and salt. Whisk the dry ingredients together for 30 seconds so the meringue powder distributes through the sugar instead of clumping.
- Mix in the water and vanilla. Start with 5 tablespoons of warm water and the vanilla. Beat on low until the sugar is wet, then crank up to medium-high. Beat for 3 to 4 minutes until you get stiff, glossy peaks that hold a line when you drag a knife through.
- Divide the base. Scoop out a small portion (about 1/4 cup) into a separate bowl. This is your “deepen” batch for later. Keep the main bowl covered with a damp towel while you color.
- Color the main batch one shade lighter than your target. Dip a toothpick into your red gel and add a tiny smear at a time. Stir with the toothpick (not the mixer) so you don’t whip air into the icing. Stop when the icing looks just a touch lighter than ripe cherry red.
- Rest the icing. Press plastic wrap directly onto the surface, seal the bowl, and let it sit at room temperature for at least 1 hour — up to overnight. Red is the one color that keeps darkening as it sits, and the resting time is where the color becomes what you actually wanted.
- Check the color and deepen if needed. After the rest, stir the icing gently. If it still looks lighter than you want, dip into your reserve batch and add a small amount of pre-colored icing to deepen it. Go slowly — you can always add more, you can’t take it out.
- Thin for piping. For outlining, use the icing as-is. For flooding, add water 1/2 teaspoon at a time, stirring gently, until a ribbon of icing disappears back into the bowl in 10 to 15 seconds.
- Stir again before piping. Icing that has rested will have a thin crust on top even under plastic wrap. Stir it down to a smooth, even consistency before you fill your bags or bottles.
Why Your Red Always Turns Pink (and How to Fix It)
Royal icing lightens as it dries — sometimes a lot, sometimes a little. The color you see in the bowl is almost never the color you’ll see on the cookie an hour later. This happens because water evaporates from the surface, leaving the pigment spread thinner, and because red pigment oxidizes on contact with air and shifts slightly warmer.
The fix is to color one shade darker than your target, then trust the rest. Most home bakers stop too early because the bowl looks bright red already, and they end up with coral or salmon on the cookie. If you’re unsure, err on the side of “this looks slightly too dark in the bowl,” because it almost never is once it dries.
Two other culprits for pink instead of red: a buttery or ivory base (clear vanilla and pure white meringue powder keep your base the brightest), and overmixing the color in (whipping air into the icing makes the dried surface look lighter because the air pockets scatter light). Stir your color in by hand with a toothpick.
Choosing the Right Red Food Coloring
Not all red dyes are equal, and for royal icing the difference between a deep Christmas red and a washed-out coral comes down to pigment concentration and base.
- Gel food coloring is the gold standard. Americolor Super Red and Sugar Art Master Elite are the two most-used by cookie decorators because a tiny amount gives intense color without watering down the icing.
- Paste coloring (Chefmaster, some Wilton tubes) is similar to gel but slightly thicker. Works fine; just takes a little more stirring to dissolve.
- Liquid food coloring (the little dropper bottles, including most Wilton retail sets) is the wrong tool for red royal icing. You need 30 to 40 drops for the same color a single toothpick swipe of gel gives, and that much liquid thins the icing, makes it slide off the cookie, and leaves a bitter aftertaste.
- Oil-based coloring (like the candy color sprays from craft stores) does not mix into royal icing at all. The oil separates and the color sits on top. Skip it.
If your base is pure white (clear vanilla, white meringue powder, fresh powdered sugar), gel gives you the deepest red. If your base has even a slight yellow cast from buttery vanilla or aged meringue powder, you’ll need to push the color one notch deeper to compensate. Americolor also makes a “No-Taste Red” formula that’s worth tracking down if your icing has been leaving a metallic, bitter aftertaste — it uses a different pigment that doesn’t read as chemical on the tongue.
Getting the Consistency Right for Piping
Color and consistency work against each other in royal icing: the more color you add, the thicker the icing gets, and the more you’ll need to thin it back. Get the color where you want it first, then thin — not the other way around.
For outlining, the icing should be the texture of thick toothpaste. A line piped onto a cookie should hold its shape without spreading or sinking into the surface. If the line blurs at the edges, the icing is too thin; if it piles up like rope, it’s too thick.
For flooding, the standard test is the “10-second rule”: drag a knife or spoon through the surface of the icing, and the line should disappear back into a smooth surface in 10 to 15 seconds. Red icing sometimes wants to sit at the longer end of that range (closer to 15 seconds) because the gel slightly stiffens the icing even after thinning.
Pipe the outline first, let it set for 2 to 3 minutes so it forms a dam, then flood the inside. If the flood icing bleeds under the outline, your flood is too thin — let it rest uncovered for 5 minutes to thicken slightly, or add a little more sifted sugar. If the icing crusts in the tip before you finish piping, your bag is too thick and the room is too dry — thin the next batch a touch more and cover the bag with a damp towel between piping sessions.
Common Mistakes (and How to Fix Them)
Almost every red icing problem has the same root cause: someone used liquid dye, or colored too late, or skipped the rest. Here’s how to recognize each one and what to do about it.
Using liquid red dye. If your icing tastes bitter or metallic, that’s the dye, not the sugar. Switch to gel or paste — the same color comes out of a tiny smear instead of 30 drops, and the icing structure stays intact. There’s no way to fix bitter liquid-dyed icing except to start over.
The icing dried pink instead of red. You stopped coloring too early. Next time, go one full shade darker in the bowl than your target on the cookie. If you’ve already piped, the only fix is to let the icing rest longer in the bowl and re-pipe — you can’t add color to already-piped icing without disturbing the surface.
The icing bleeds under the outline. Your flood is too thin, or your outline hasn’t set yet. Let the outline dry for 3 full minutes before flooding, and thicken the flood batch by stirring in a tablespoon of sifted powdered sugar.
The icing crusts in the piping tip. The room is dry, or your icing is too thick. Thin the next batch one notch looser, and keep a damp towel over your piping bag when you’re not actively squeezing. If your house is below 40% humidity, run a humidifier or work near the kitchen sink with hot water running while you pipe.
The icing looks orange after drying. You used too much yellow-based dye or a brownish base. Most “red” gel dyes lean warm — they’re actually closer to red-orange in the tube. If your cookies are drying orange, mix in a tiny smear of pink or purple gel (the complement of yellow) to pull the color back toward true red. A toothpick tip is enough.
The color fades after a day. Light exposure and air pull pigment out of red dye faster than any other color. Store finished cookies in an opaque container, not a clear glass jar on the counter. For cookies that need to stay vivid for a week or more, finish with a light spray of edible lacquer once the icing is fully dry.
Pro Tips for a True Holiday Red
Once you’ve got the basic method down, a few extra moves turn good red icing into bakery-window red.
Build color in two rounds. Add half your red, rest the icing for an hour, then add the rest. Each round of pigment settles into the icing more deeply than if you dumped it all in at once. This is the single biggest difference between amateur red and pro red.
Rest in a dark bowl. Light degrades red dye fast. If you’re resting icing for more than an hour, cover it and tuck it inside a cabinet rather than leaving it on the counter.
Use a complementary color trick. Adding a barely-visible amount of green or purple (literally a toothpick tip, no more) deepens red without making it look muddy. It’s the same principle behind velvet paintings and old-school poster printing — a tiny shift in hue makes the dominant red read richer.
Pair red with green and white. Red looks more red when it’s next to green and white. This isn’t just design theory — it’s how the eye compares colors. If you’re decorating a holiday tray, leave generous white borders and add at least one green element per cookie.
Finish with edible lacquer. Once the icing is fully dry (give it at least 6 hours), a light mist of edible lacquer spray gives red a glossy, deep, slightly wet look that lasts for weeks. Don’t spray it on wet icing or the surface will streak.
Store royal icing smartly. Pressed plastic wrap directly on the surface, sealed container, room temperature for up to two weeks, or the freezer for three months. Thaw at room temperature, then re-stir — it’ll be just as smooth as the day you made it.
Frequently Asked Questions
Does red royal icing taste different from white royal icing?
Yes, slightly. Red gel dye adds a faint bitter or metallic note, especially if you overshot the amount. Using a no-taste formula like Americolor No-Taste Red, or limiting yourself to the minimum color needed, keeps the taste close to standard royal icing.
Can I make red royal icing without eggs?
Yes. Most modern royal icing recipes use meringue powder instead of raw egg whites, which gives the same structure without any eggs. If you want to avoid eggs entirely, aquafaba (chickpea liquid) also works as a substitute at about 3 tablespoons per egg white.
How long does red royal icing take to dry on cookies?
Royal icing sets to the touch in 1 to 2 hours at room temperature, but it needs a full 6 to 8 hours to cure hard enough to stack or package. In humid kitchens, give it closer to 12 hours. A small fan pointed at the cookies speeds up drying.
Why does my red royal icing look orange after it dries?
Most red gel dyes are actually closer to red-orange in the tube, and that warmth shows up more once the icing dries and lightens. To pull the color back toward true red, stir in a toothpick tip of pink or purple gel — the complement of yellow. It deepens the red without making it look muddy.
How far in advance can I make red royal icing?
Red royal icing keeps in the fridge for up to two weeks in an airtight container with plastic wrap pressed onto the surface. It also freezes well for three months. After thawing, give it a slow stir to bring it back to a smooth consistency before use.
What is the best red food coloring for royal icing?
Americolor Super Red and Sugar Art Master Elite are the two most-used red gel colors by cookie decorators because they give intense color from a tiny amount. Chefmaster Red-Red is a close third. Avoid the liquid dropper bottles, which take far more product and leave a bitter aftertaste.
Start with a clean white base, color it with gel one shade darker than you think, and let it rest so the pigment can do its work. That’s the whole trick to how to make red royal icing that holds up from the first piped cookie to the last one on the cooling rack. The rest — thinning for piping, pairing with white and green, finishing with a mist of lacquer — is what takes it from a pretty red to a vivid holiday red.