
Outlining and flooding sugar cookies is a two-pass royal icing method: pipe a thicker icing border around the cookie to hold everything in, then fill the center with thinner icing that self-levels into a smooth, flat surface. Plan on about 30 minutes of decorating time per dozen cookies plus overnight drying, and you’ll get bakery-smooth results on your first try.
If you’ve watched a cookie decorating video and wondered how people get that glassy, even finish, this is the exact process. The outline is the dam. The flood is the lake. Once you understand those two roles, every other cookie decorating technique (wet-on-wet dots, layered details, lettering) just stacks on top.
Table of Contents
What You Need
You don’t need a long shopping list. Most of these are pantry or craft-closet items, and you can skip anything marked optional on your first batch.
- Cooled sugar cookies, baked the day before so they’re completely room temperature. Warm cookies melt the icing and make it slide off the edge.
- Royal icing, homemade or a quality store-bought mix. One batch of base icing split into two bowls is plenty for about 2 to 3 dozen medium cookies.
- Piping bags, 12-inch or 16-inch disposable bags work fine. Tipless bags are easier for beginners since you cut the tip to size.
- Couplers and round piping tips, a #2 or #3 for outlines and a #4 or #5 (or a squeeze bottle) for flooding. The smaller tip gives crisp lines; the wider opening lets the flood icing flow.
- Scribe tool or toothpick, for spreading icing into corners and popping air bubbles. A needle tool from the cake decorating aisle works perfectly.
- Squeeze bottle, optional but helpful for flood icing, especially on larger cookies. Gives you more control than a piping bag for filling.
- Gel food coloring, a few drops give vivid color without thinning the icing the way liquid colors do.
- Small bowls and a spoon, for tinting and mixing different colors.
- Parchment paper or silicone baking mat, to set cookies on while the icing dries.
- Cooling rack, optional, for letting air circulate under the cookie as it dries.
You can find almost all of this in a big-box craft store or online. The only thing you truly can’t skip is the scribe. Reviewers report it’s the difference between a homemade-looking cookie and one that looks polished.
Mix Royal Icing to Two Consistencies
The royal icing recipe itself isn’t the focus here, but the consistency is everything. The classic ratio is 4 cups powdered sugar, 3 tablespoons meringue powder, and about 5 to 6 tablespoons of water, plus a teaspoon of vanilla or clear extract for flavor. Mix on low until smooth, then beat on medium for about 4 to 5 minutes until the icing forms soft peaks.
Once your base is mixed, split it into two bowls. The first bowl stays thick for outlining, the consistency of soft-serve ice cream. The second bowl gets a small splash of water (start with half a teaspoon) and is stirred down to a thinner flood consistency. To test, drizzle a ribbon of icing off your spoon back into the bowl and count the seconds until the ribbon disappears into the surface. Outline icing should disappear in about 5 to 8 seconds; flood icing should disappear in about 10 to 15 seconds. Most home bakers find the 10-second flood is the sweet spot, not too thick, not too runny.
Tint each bowl with gel food coloring now, before you bag it. Once the icing is in a bag, you can’t see the color evenly and you’ll end up with streaky swirls you didn’t want.
Cover both bowls with a damp paper towel pressed directly onto the surface. This prevents the icing from crusting over while you work, which is the #1 reason beginners lose piping time. Reviewers on cookie decorating forums consistently call icing consistency the hardest part of the whole process, so give yourself permission to mix a test cookie before committing to the full batch.
Step-by-Step: Outline, Then Flood
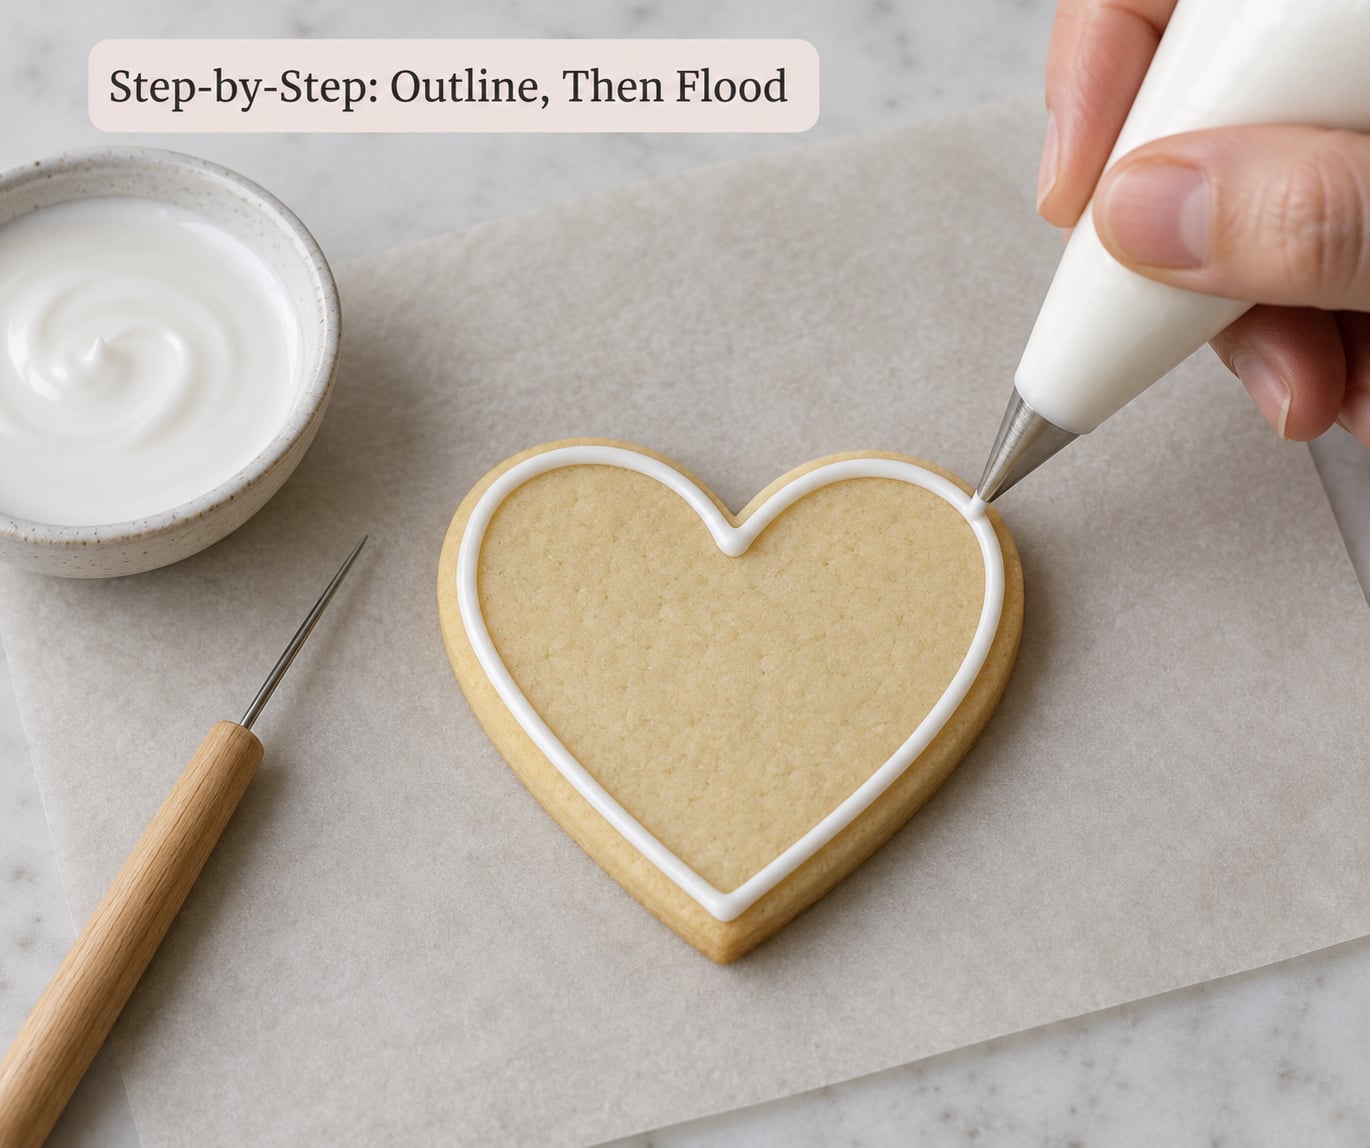
The two-pass method works whether you outline first and flood right after, or flood in sections as you go. The flow below is the most beginner-friendly version.
- Stir and tint your icing. Royal icing separates fast in the bowl, so give each color a quick stir with the back of a spoon before loading the bag. Push the icing down to the tip of the bag, then twist the top closed and secure with a rubber band.
- Pipe the outline. Hold the bag at a 45-degree angle about a quarter inch above the cookie surface (not touching). Squeeze a steady, even bead of outline icing around the edge, lifting the tip as you round corners so the line stays smooth. For sharp corners on stars or trees, pause briefly at the point, let the icing pool, then lift cleanly. You’ll know it worked when the outline looks like a continuous rope, no gaps, no thin spots.
- Switch to the flood bag or bottle. Within a minute or two of piping the outline, thin your flood icing if it has thickened back up. Stir gently, don’t beat, because aggressive mixing traps air bubbles that will pop up in the surface later.
- Fill inside the outline. Pipe or squeeze flood icing into the center of the outlined area, starting in the middle and letting it spread outward. Don’t try to push the flood all the way to the edge; gravity and surface tension do that work. Stop when the flood has spread to within a hair of the outline on all sides. You’ll know it’s right when the icing settles into a flat, even layer in about 5 to 15 seconds of watching.
- Use a scribe to pop air bubbles and spread. Run the scribe lightly through the flood to guide the icing into any corners the outline left bare. Tap the cookie once on the counter to release trapped air, then use the scribe to pop any bubbles that rise to the surface within the first 30 seconds. Air bubbles that survive past that point will harden into tiny craters.
- Tap or shake to settle. Pick up the cookie a half inch above the counter and drop it flat. The vibration brings any remaining low spots to the surface. Set the cookie on parchment to dry undisturbed.
Work one cookie at a time, outline then flood, until you build a rhythm. The outline icing starts to crust within a few minutes depending on humidity, so don’t pipe borders and walk away.
Add Details and Let the Icing Dry
While the flood is still wet (within 5 minutes of filling), you can drop sanding sugar, sprinkles, or edible glitter onto the surface for a textured finish. The sugar sticks to wet icing and embeds itself as the icing dries, so there’s no glue step needed. If you want wet-on-wet designs (polka dots, hearts, plaid lines), pipe those colors onto the wet flood right after filling, and use the scribe or a toothpick to drag them into shapes before everything sets.
For wet-on-dry details (fine line work, lettering, layered accents), let the base flood dry completely first. Then pipe your details on top with a thicker, more detail-oriented icing consistency. Trying to do fine work on a wet surface causes the new color to bleed into the base layer.
Drying times depend on humidity and how thick you flooded. At normal room humidity, cookies are dry to the touch in 6 to 12 hours. They’re safe to stack with parchment between layers after 24 hours. If you’re in a hurry, set a small fan pointed across (not directly at) the cookies, or use a food dehydrator on the lowest setting for about an hour. Avoid the oven, since residual heat can melt the icing sheen.
Once fully dry, store cookies in a single layer in an airtight container at room temperature. They’ll keep for up to 2 weeks. For longer storage, layer them between sheets of parchment in a rigid container so the icing doesn’t dent. Freezing works too: thaw uncovered on paper towels so any condensation beads off the icing instead of dripping onto it.
Common Mistakes and How to Fix Them
Every cookie decorator has flooded a cookie that turned into a small disaster. Here are the five most common problems and the fix for each.
Outline icing too thin. It bleeds outward and disappears into the flood, leaving you with no defined edge. Mix in another tablespoon of powdered sugar to stiffen it back up, or restart with a thicker batch.
Flood icing too thick. It piles up in the middle instead of self-leveling, leaving a puffy, uneven surface. Stir in water a quarter teaspoon at a time until a spoon drizzle disappears in 10 to 15 seconds.
Flood icing too thin. It runs over the outline and drips off the cookie. Dust in more powdered sugar until the consistency tests right. If you’ve already flooded the cookie, scrape the icing off the cookie back into the bowl, re-thicken, and try again.
Air bubbles trapped under the surface. They harden into tiny craters you can’t fix after the icing sets. Tap the cookie on the counter right after flooding and use the scribe to pop any bubbles within the first 30 seconds. Mixing the icing gently rather than beating it also cuts down on trapped air.
Colors bleeding between sections. Dark colors like black, red, and deep purple are the usual suspects. Let each color dry fully before adding adjacent colors, or use a slightly thicker icing for the borders between colors to act as a dam.
Frequently Asked Questions
What icing consistency do I use to flood sugar cookies?
Flood icing should drizzle off a spoon and disappear back into the bowl in about 10 to 15 seconds when you count. That range gives you a flood that’s thin enough to self-level into a smooth, flat surface but thick enough to stay inside the outline. If the ribbon disappears faster than 10 seconds, your icing is too thin and will run over the edges. If it takes longer than 15 seconds, it will sit in a puffy layer instead of settling.
How long does it take flooded sugar cookies to dry?
At normal room humidity, flooded sugar cookies are dry to the touch in about 6 to 12 hours and fully cured for stacking in about 24 hours. Humidity, icing thickness, and color all affect timing. Using a small fan or a food dehydrator on the lowest setting can cut drying time to about an hour, but skip the oven since heat dulls the icing’s shine.
Why are my flooded cookies bumpy or full of air bubbles?
Bumpy cookies and tiny craters usually mean air got trapped during mixing or flooding. Stir the icing gently rather than beating it, let it sit for 10 to 15 minutes after mixing so bubbles rise, and tap each cookie on the counter right after flooding. Pop any visible bubbles with a scribe tool within the first 30 seconds, because bubbles that survive past that window harden in place.
Can I use store-bought royal icing instead of making my own?
Yes, store-bought royal icing works for both outlining and flooding, especially the pre-mixed tubed kind designed for cookies. Most are already at or near flood consistency, so you may need to thicken a portion with powdered sugar for outlining. Check the label, since some store-bought icings are made for detail work only and will run if you try to flood with them.
How do I keep colors from bleeding when I flood sugar cookies?
Color bleeding happens when wet icing touches wet icing. The simplest fix is to let each color dry completely (about 1 to 2 hours) before adding the next one adjacent to it. For designs where colors meet while still wet, like wet-on-wet dots, use a slightly thicker icing for the borders between sections to act as a dam, and work quickly so neither color has time to soften the other.
Conclusion
Start with a simple shape, a circle or a heart, on your first batch so the outline has no tricky corners. Mix your flood icing to a 10-second ribbon, pipe the outline, flood right behind it, and use the scribe to nudge the icing into place. Then give every cookie a full overnight dry before you even think about stacking. Once your first dozen come out smooth and shiny, every fancier design (wet-on-wet flowers, layered details, monogrammed letters) is just the same two-pass method dressed up.