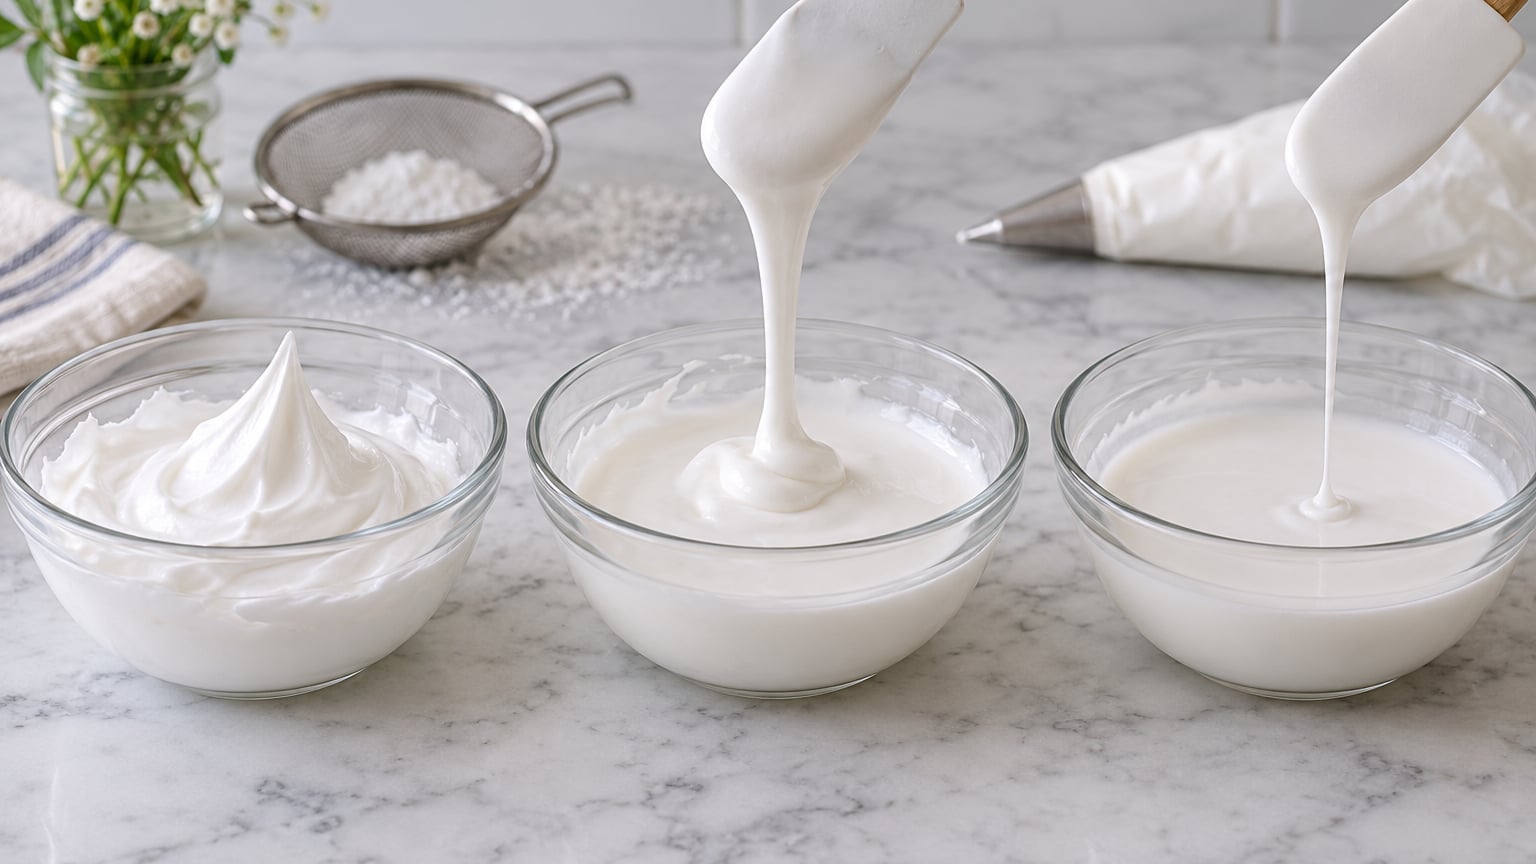
Royal icing consistency is the single skill that makes cookie decorating click. Once you can tell piping, flooding and dipping icing apart by feel, every outline stays crisp and every flood levels itself out. In this royal icing consistency guide for beginners, I will walk you through the three consistencies, the simple tests that tell you which one is in your bowl, and the small fixes that rescue a batch that has gone too thick or too thin.
Table of Contents
What You Need
Good icing starts before the mixer goes on. Gather everything first so you are not hunting for a clean spoon when the bowl is already full.
Ingredients: meringue powder (or pasteurized liquid egg whites), sifted powdered sugar, room-temperature water, a teaspoon for thinning, optional vanilla or almond extract, and gel food coloring in a few colors. Powdered sugar should be sifted once, because even a small lump will clog a piping tip and leave a snail trail on the cookie.
Tools: a stand mixer with the whisk attachment (a hand mixer works too), two or three medium mixing bowls, silicone spatulas, a set of piping bags, couplers and round tips in #1, #2 and #3, a small offset spatula, and a few sheets of parchment paper for testing. A clean butter knife or small offset spatula is your consistency tester; a stopwatch on your phone is the only “specialty” tool you need.
Step-by-Step: Mixing and Testing Royal Icing Consistencies
Start every batch the same way and then thin it down to the consistency you need. The mix-to-thin order is easier than mixing three separate bowls, and it stops you from guessing ratios every time.
Step 1: Mix the Base Icing
Whisk 3 tablespoons of meringue powder with about 6 tablespoons of warm water in a stand mixer bowl until the surface looks foamy, roughly 30 seconds. Add 1 pound of sifted powdered sugar on low speed so the cloud does not billow over the rim, then crank up to medium and beat 4 to 5 minutes.
You are looking for stiff, glossy peaks that stand straight up when you lift the whisk. This is your “base” icing, and it is also the consistency you would use for stiff flowers, structural gingerbread glue and 3D decorations. From here, every other consistency is just water added by the half-teaspoon.
Step 2: Make Piping Consistency
Scoop about a cup of base icing into a separate bowl. Add water by the half-teaspoon, stirring gently with a spatula and letting the icing rest a moment between additions. Stop when a knife drawn through the icing leaves a clean channel that fills in within about 3 seconds.
This is the workhorse consistency for outlines, lettering, dots, small petals, filigree and any detail you want to hold its shape. The line should look like wet toothpaste when it drops off the spatula: thick, but soft enough to settle without help.
Step 3: Make Flooding Consistency
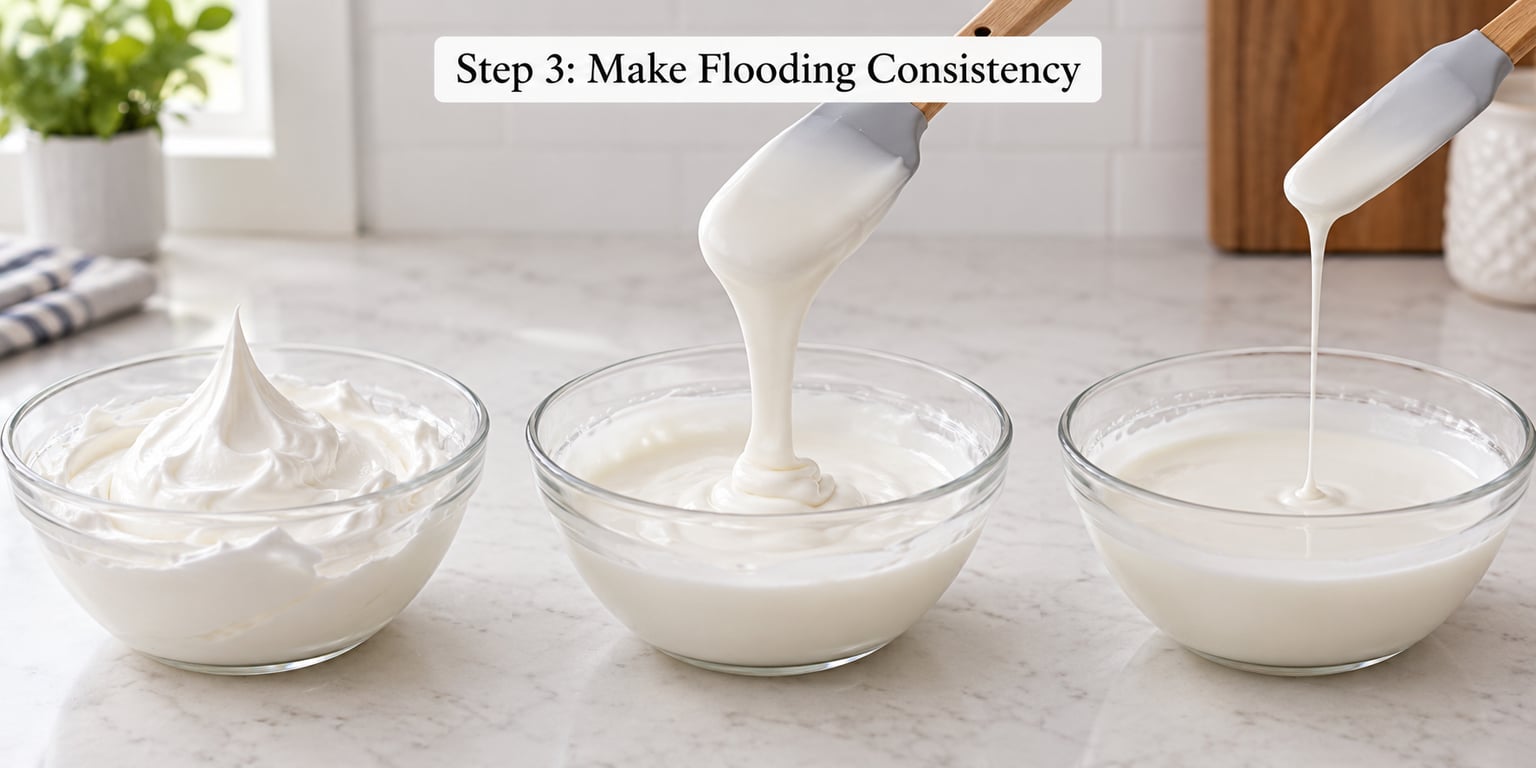
Add another half to full teaspoon of water per cup of piping icing, stirring slowly. Test by drizzling a spoonful back into the bowl. The ribbon should flow off the spoon, land on the surface, and disappear into the rest of the icing in roughly 5 to 10 seconds. If you count, that is the famous “icing count” most bakers reference.
Flooding consistency is what you use inside an outline. It should level itself out within 10 to 15 seconds of being spread with a toothpick or scribe tool, and it should not run past the outline edge when the cookie is held flat.
Step 4: Make Dipping Consistency
Add one more half-teaspoon of water per cup until a spoonful dropped back into the bowl vanishes in about 1 second and a stream falling off the spatula looks thin and steady, almost like heavy cream. This is the runniest of the three.
To use it, hold a cookie face-down and dip the top straight in, then pull it out in one smooth motion. Let the excess drip back into the bowl for a second before flipping the cookie right-side up on a rack. Dipping is the fastest way to coat a whole batch of round or geometric cookies, and it gives you a perfectly smooth, level surface with no piping skills at all.
Step 5: Adjust, Color and Store
Tint with gel food coloring, using a toothpick to add color a little at a time. Gel gives you saturated colors without thinning the icing the way liquid food coloring does, and one drop of gel is roughly equal to ten drops of liquid.
Cover every bowl with plastic wrap pressed directly onto the surface of the icing, or lay a damp paper towel right on top before adding the lid. Air is the enemy: it forms a crust in minutes, and that crust is what clogs your tip mid-pipe. Royal icing keeps at room temperature in an airtight container for up to 2 weeks; stir it briefly before reusing because the water separates out as it sits.
The 3 Royal Icing Consistencies at a Glance
When you are mid-batch and need a quick answer, this table tells you exactly what to aim for. Match the spoon test to the use, not the other way around.
| Consistency | Water Added (per cup) | Spoon / Spatula Test | Best For | Visual Cue |
|---|---|---|---|---|
| Piping | Start with 1 tsp, add more | Knife channel fills in 2 to 3 seconds | Outlines, lettering, dots, detail work, flowers | Holds a soft peak, like smooth peanut butter |
| Flooding | About 1.5 to 2 tsp total | Ribbon disappears in 5 to 10 seconds | Filling outlined areas, wet-on-wet designs | Flows in a slow ribbon, self-levels on the cookie |
| Dipping | About 2.5 tsp or more | Stream vanishes in about 1 second | Full-coverage round or geometric cookies | Runs in a thin, steady stream, like heavy cream |
How to Tell If Your Icing Is Too Thick or Too Thin
Even experienced bakers overshoot. The good news is that the fix is one teaspoon of either powdered sugar or water, and the signs are easy to read once you know them.
Too thick: the icing breaks instead of flowing, peaks crumble when you pull a spoon through, and piped lines look rough or “fuzzy” on the edges. Colors also look chalky because the pigment is locked in dry sugar. Fix it with water, half a teaspoon at a time, stirring and waiting 30 seconds between additions.
Too thin: the icing runs off the cookie edge, colors look translucent, and piping lines collapse or sag into a blob. It also takes forever to dry. Fix it with sifted powdered sugar, one teaspoon at a time, mixing slowly so you do not puff sugar across the kitchen.
Common Mistakes (and How to Fix Them)
Every beginner hits the same handful of snags. A quick line for each one saves you a batch of ruined cookies.
Skipping the sift. A single hard lump of powdered sugar will clog a #1 tip and leave a string of icing dragging across a finished cookie. Sift once, even if the bag looks fine.
Adding water too fast. Two big splashes and you have skipped straight past flooding into dipping. Always go half a teaspoon at a time and re-test with the spoon.
Icing thinning out during a long session. The mixer warms the icing, humidity creeps in, and the bowl slowly loosens. Re-test every 15 minutes and tighten with a pinch of powdered sugar if outlines start to slump.
Color bleeding between sections. Wet-on-wet only works if the base layer has skinned over. Wait 10 to 15 minutes between colors, or use a hair dryer on cool to speed the skin.
Icing crusting mid-pipe. A skin forms on the surface of the bowl in minutes. Keep a damp paper towel pressed onto the icing you are not actively piping, and replace it whenever it dries out.
Air bubbles in flooded areas. They show up as little craters once the icing dries. Pop them right after flooding by passing a toothpick across the surface, or use a scribe tool to nudge each bubble to the edge.
Tips for Success
A few habits make royal icing feel less like guesswork and more like a recipe you can repeat.
Start thicker than you think. It is faster to thin a batch than to thicken one, because every extra spoon of powdered sugar has to be sifted in or you get lumps.
Test on parchment before the cookie. Draw a small circle, count to 10, then poke it. The icing should hold a clean line, not run back into itself.
Use gel color, not liquid. Liquid food coloring adds water and dilutes your carefully tuned consistency, while a toothpick-dab of gel changes color without changing the icing.
Work in small bowls. One cup of icing at a time keeps a single consistency consistent. Big batches shift in thickness as you work through them.
Stir, do not beat, between colors. Vigorous mixing whips air into the icing, and that air turns into craters when the flood dries.
Let each color layer dry 10 to 15 minutes before the next. The icing is dry to the touch in 1 to 2 hours, fully hardened in 6 to 8 hours, and safe to stack after 24 hours in a dry room.
Frequently Asked Questions
How long does royal icing take to dry on cookies?
Royal icing dries to the touch in 1 to 2 hours and hardens fully in 6 to 8 hours. For stacking or packaging, wait a full 24 hours in a cool, dry room. Humidity and thick layers of flooding icing will stretch those times, so plan an overnight rest before sealing cookies in bags or tins.
Can I fix royal icing that is too runny?
Yes. Stir in sifted powdered sugar, one teaspoon at a time, until the icing passes the spoon test for the consistency you actually want. Mix slowly so you do not whip in air bubbles, and give the icing 30 seconds to settle before testing again. Most runny batches are rescued with 1 to 3 teaspoons of sugar per cup.
How much water do I add to thin royal icing?
Start with half a teaspoon of water per cup of stiff icing, stir, and test. Most piping icing needs about 1 teaspoon total, flooding about 1.5 to 2 teaspoons, and dipping closer to 2.5 teaspoons. Add water slowly, never in a splash, because it is much easier to add more than to take it back out.
Do I have to use meringue powder, or can I use egg whites?
Both work. Pasteurized liquid egg whites are a clean substitute and give a slightly glossier finish, while meringue powder is shelf-stable and safer for food gifts. Use about 3 tablespoons of meringue powder per pound of sugar, or 3 to 4 tablespoons of pasteurized egg whites. Avoid raw egg whites for safety.
Why is my royal icing not getting stiff peaks?
Almost always one of three things: the meringue powder is old, the sugar was added before the powder and water foamed, or humidity has dampened the sugar. Start with a fresh jar of meringue powder, sift the sugar, and beat the full 4 to 5 minutes on medium before judging. If peaks still flop, add another teaspoon of meringue powder and re-beat.
How long can royal icing sit out before it goes bad?
Stored in an airtight container with plastic wrap pressed onto the surface, royal icing keeps at room temperature for up to 2 weeks. Refrigeration is not recommended because condensation forms on the surface and thins the icing. For longer storage, freeze the icing in a sealed container for up to 3 months and thaw it in the fridge overnight before re-whipping.
Pipe a small batch of outlines on parchment before you touch a real cookie, and trust the spoon test more than your eyes. Once you have made one good bowl of royal icing, the next dozen feel like the same recipe. Pull a sheet pan out of the oven, mix a stiff base, and thin it into the three consistencies in this guide: your cookies will thank you for it.